Tuesday, May 31, 2011

Hearty Meat Lasagna

Tim and I made this lasagna a few weeks ago, and we loved it.  Although the recipes from The New Best Recipe often feel overly complex and time-consuming, this one was actually quite fast to pull together, and with excellent results.  The meat sauce cooks on the stove and doesn't need time to boil away for hours like some meat sauces - although it tastes a little "raw" if you try some right out of the pot before baking the lasagna, everything comes together perfectly after the sauce spends some time in the oven with the cheese and noodles.  I also love the ricotta spread in the lasagna.  I usually just spread plain ricotta cheese on my noodles, and while that tastes good, the ricotta-egg-Parmesan-basil combo is even better!  The fresh basil leaves in particular really add a lot of fantastic flavor to the lasagna.  Overall, a great meal - and the perfect accompaniment to watching Twin Peaks on Netflix!  We served it with some fresh snap peas on the side - yum!


Hearty Meat Lasagna (from The New Best Recipe)
Serves 8

For the sauce:
1 T canola oil
1 medium onion, chopped
6 large garlic cloves, minced
1/3 pound ground beef
1/3 pound ground veal
1/3 pound ground pork
1/2 tsp salt
1/2 tsp pepper
1/4 cup heavy cream
28-ounce can tomato puree
28-ounce can diced tomatoes, drained

To assemble:
15 ounces ricotta cheese (non-fat is ok, or use part- or full-fat)
2-1/2 ounces Parmesan cheese, grated, divided
1/2 cup chopped fresh basil
1 large egg
1/2 tsp salt
1/2 tsp pepper
12 no-boil lasagna noodles
1 pound whole-milk mozzarella, shredded

1. Preheat oven to 375 degrees.
2. Make the sauce.  Heat the oil in a large saucepan over medium heat.  Add the onion and cook until translucent but not browned.  Add the garlic and cook until fragrant.
3. Increase the heat to medium high and add the meat, salt, and pepper.  Cook until the meat is no longer raw, but is not browned.
4. Add the cream and bring to a simmer.  Simmer until the liquid is evaporated and only the fat remains.
5. Add the tomato puree and diced tomatoes.  Bring to a simmer and simmer for 3-5 minutes.  Set aside while you prepare the remaining ingredients.
6. Combine the ricotta, 1 cup of the Parmesan, the basil, egg, salt, and pepper in a medium bowl.  Mix with a fork until creamy.
7. Ladle 1/4 cup meat sauce into the bottom of a 13x9-inch baking dish and spread to cover.  Spread 3 T of the ricotta mixture onto a noodle in an even layer.  Repeat with two more noodles to make a single layer of 3 noodles.
8. Sprinkle with 1 cup mozzarella, and then spoon over 1-1/2 cups meat sauce and spread evenly.
9. Repeat the noodle-ricotta-mozzarella-sauce procedure two more times.
10. Place the remaining three noodles on top, spread with the remaining sauce, and then sprinkle with the remaining mozzarella and Parmesan.
11. Spray a piece of foil with oil and cover the lasagna, oil-side down. Bake 15 minutes.  Remove the foil and bake a further 25 minutes.
12. Remove from the oven and let cool ten minutes before serving.

Wednesday, May 25, 2011

Cookbook Giveaway!

I'm trying to clean out my bookshelf because it's more than overflowing with cookbooks!  And - you all get to benefit from this.  I'm giving away a few cookbooks that I don't quite have room for anymore - though they're all great cookbooks, they're just not quite my style of cooking or I've got too many similar cookbooks and I need the space! 

Here's the list of cookbooks I'm giving away:

The Mayo Clinic Williams-Sonoma Cookbook: Simple Solutions for Eating Well
Blog Aid: Recipes for Haiti
500 Cupcakes: The Only Cupcake Compendium You'll Ever Need
Seriously Simple Holidays: Recipes and Ideas to Celebrate the Season
Confetti Cakes For Kids: Delightful Cookies, Cakes, and Cupcakes from New York City's Famed Bakery
Cooking Light Annual Recipes 2004

If you'd like to win any of these cookbooks, just leave a comment here with a link to a summer recipe you think I should try (from your blog or any other website), as well as the cookbook(s) you'd love to add to your collection.  If multiple people want the same cookbook, I'm draw a random number.  I'm headed to Ohio for my college reunion and a visit with my folks, so comments will be open until I return on June 7!

Tuesday, May 24, 2011

Israeli Couscous Salad with Red Grapes and Sauteed Vegetables

This pasta salad was the final part of the epic dinner I made last week.  Although it was tasty, I didn't think it really went with the burgers and sweet potatoes - I think I'd be more likely to serve this as picnic or lunch food.  Israeli couscous is combined with sauteed veggies (onion, bell pepper, and snap peas) and red grapes, and then everything is tossed with a yummy fresh thyme dressing.  The one thing we thought was missing was acid - and so when I ate the leftovers, I squeezed lemon juice all over the salad before eating it, which just brought everything together and made the salad way more delicious.  (I've included the lemon juice in the recipe below, because I definitely consider it essential!)  This makes for a great side dish, but you could also add something else to make it a bit heartier and serve it as a light main dish - perhaps pine nuts and feta cheese, or cubed roasted chicken, or even sauteed Italian sausage.


Israeli Couscous Salad with Red Grapes and Sauteed Vegetables (adapted from Salad Days)
Serves 3-4 as a side dish

Dressing:
1/4 cup olive oil
1 T Cabernet or sherry vinegar
1 T cider vinegar
1/2 T fresh thyme, minced
A few grinds of black pepper
Generous pinch of salt

Salad: 
Olive oil
1/2 large red onion, minced
1/2 yellow bell pepper, minced
Salt and pepper
1/2 cup snap peas, trimmed and sliced into small pieces
1 cup Israeli couscous, whole wheat if possible
2 cups chicken broth, hot
1 cup seedless red grapes, halved
Freshly squeezed lemon juice, to serve

1. Combine all of the dressing ingredients in a glass jar with a tightly fitting lid.  Screw on the lid, and shake vigorously until combined.  Taste and adjust for seasoning.  Set aside at room temperature until ready to use.
2. Add enough olive oil to your pan to just coat the bottom.  Heat over medium-high heat until shimmering, and then add the onion.  Cook until just softened, and then add the bell pepper and season with salt and pepper.  Cook until the vegetables are browned, and then remove from heat and stir in the peas.  Set aside until ready to use.
3. Cool the couscous.  Add more oil to the bottom of a non-stick pan (a skillet or a pot would both be fine), and heat over medium high heat.  When the oil is hot, add the couscous and saute, stirring frequently, until it is browned in a few spots.  Then add the broth in several additions, stirring occasionally (no need to stir as much as risotto.  Whenever the pot gets dry, add more liquid, until the couscous is cooked through and the liquid is evaporated.
4. Remove the couscous from the heat. Stir the reserved vegetables and the grapes into the couscous.  Then add about half the dressing.  Stir to combine, and add more dressing as needed.  Taste and adjust for salt and pepper.
5. Just before serving, squeeze lemon juice over each portion and serve either warm or room temperature.

Saturday, May 21, 2011

Coconut-Chocolate Chip Cookies

I whipped up these cookies after my boyfriend had a bad day at work - I say that coconut and chocolate cure all ills!  Unlike pretty much every cookie in the world, these cookies are actually best after they cool, making them the perfect candidate for baking before you plan to eat them.  I tried one warm and gooey a few minutes after they came out of the oven, and thought the cookies were relatively blah - certainly nothing special.  However, after they cooled, they were amazing!  The cookies stay wonderfully chewy, and the bittersweet chocolate chunks are a fantastic balance to the sweet coconut - and the cookies are serious addictive.  Be aware that the cookies don't taste overly sweet, so these aren't for you if that's what you're looking for.  Do take the extra time to chop up a really good bar of dark chocolate rather than using chocolate chips - it really makes a difference here, both in flavor and appearance!


Coconut-Chocolate Chip Cookies (adapted from Elizabeth's Edible, original recipe here)
Makes about 20 cookies

1 cup flaked sweetened coconut
1/2 cup all purpose flour
1/2 cup oat flour
1/2 tsp baking powder
1/4 tsp baking soda
1/4 tsp salt
3/4 cup brown sugar, packed
1/4 cup unsalted butter, softened
1 tsp vanilla extract
1 large egg
4 ounces bittersweet chocolate, coarsely chopped

1. Preheat the oven to 350 degrees.  Spread the coconut in an even layer on a baking sheet (use one with raised sides to prevent accidents!).  Toast in the oven until browned, being sure to check often to avoid burning - it goes pretty fast once it starts to brown!  Set aside to let cool, and leave the oven on.
2. Whisk together the flours, baking powder, baking soda, and salt in a small bowl and set aside.
3. Cream together the sugar and butter.  Add the vanilla and beat to combine.  Add the egg and beat until well combined.
4. Add the chocolate and coconut to the batter and mix well.
5. Drop spoonfuls of dough onto a foil-lined cookie sheet, leaving lots of space between them as the cookies do spread.  Bake for about ten minutes, or until the cookies are not wet on top but still relatively pale.

Wednesday, May 18, 2011

Lamb Burgers with Honey-Whiskey Sweet Potatoes

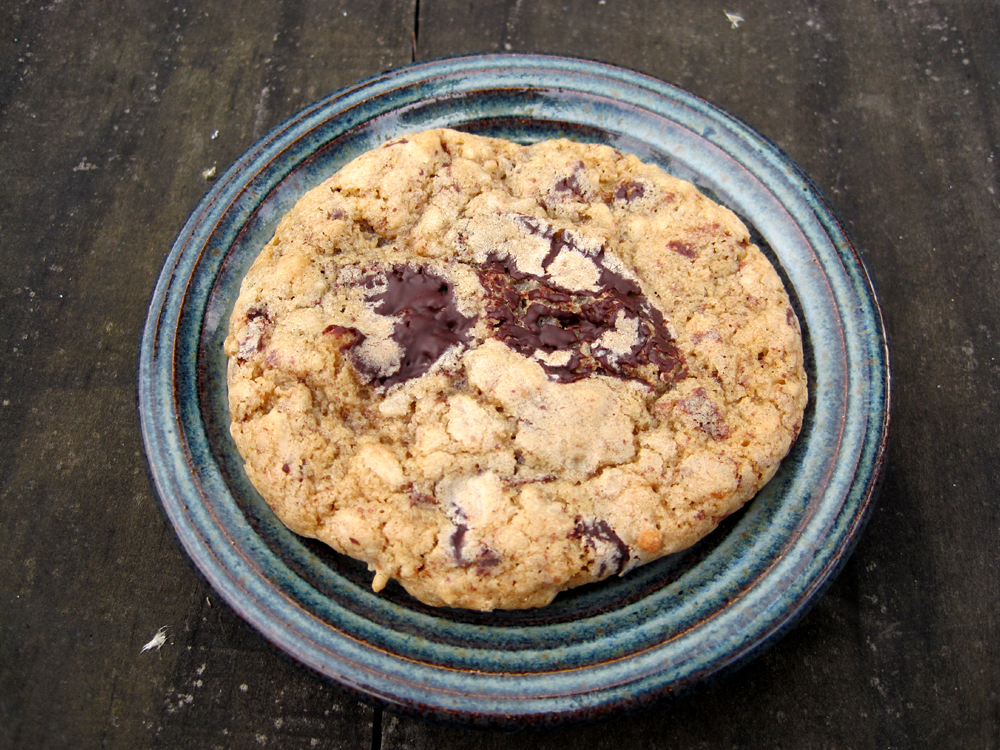
Whew! That was what I said after making a marathon dinner of lamb burgers, honey-whiskey sweet potatoes, Israeli couscous salad, and coconut-chocolate cookies.  :)  But, sometimes it can be a lot of fun to take on an ambitious cooking project in the evening - and hey, we were still done with dinner before 10 pm!  I'll share the recipes for the burgers and sweet potatoes here, and the other recipes in posts coming up soon.  All of the non-dessert dishes were inspired by Salad Days by Marcel Desaulniers - indeed, all of the components were supposed to be combined into an epic salad along with some greens.  However, I'm not big on burgers on salads, and I just thought everything would be better split up into different components - overall, I'd say my "deconstruction" worked really well and made for a great dinner!  Thanks to Culinary Concoctions by Peabody for the cookbook recommendation -- although the cookbook is out of print, there are plenty of used copies on Amazon.


First up, the lamb burgers.  These were so easy to make, and really, really delicious. The feta cheese went perfectly with the moist and flavorful lamb burgers, and my friend Andrea had some spinach on hand which added a great pop of green.  Although I'm usually addicted to lots of ketchup on my burgers, it didn't seem like that would go too well with the other flavors, so we used the Dijon mustard I got in France over spring break instead - it added the perfect punch.  So much more fun than regular beef burgers!

Lamb Burgers with Thyme and Feta (adapted from Salad Days)
Serves 3

1 pound ground lamb (adjust according to the size of burgers you prefer)
1 heaping tsp chopped fresh thyme
Salt and pepper
Canola oil
Whole wheat buns, toasted, to serve
Dijon mustard, to serve
Feta cheese, to serve
Spinach leaves, rinsed and dried, to serve

1. Combine the lamb, thyme, and salt and pepper in a plastic bowl.  Gently mix to combine with your hands, being careful not to compact the meat.  Form into 3 or 6 patties (depending on whether you want one big or two little burgers per person).
2. Heat the oil in the bottom of a skillet until shimmering but not smoking.  Cook the patties until they're as cooked as you like - we made smaller burgers and cooked them two minutes per side for medium burgers.  Remove to a paper towel-lined plate to drain, and repeat with any uncooked burgers.
3. Build your burgers on toasted buns: spinach leaves, burger, feta cheese, and mustard.  Enjoy!


On the side, I served Honey-Whiskey Sweet Potatoes, thanks to a bit of fancy whiskey from my friend Nina.  Now, let me preface this recipe by saying I think this may be the most complicated way I have ever prepared potatoes!  They're boiled, fried, and then baked!  Crazy.  Also, not worth it in my opinion.  Don't get me wrong - they were super delicious and had great flavor.  However, I think you could achieve very similar results by simply roasting the potatoes and brushing the glaze on in the last 5 minutes or so of baking.  Although I haven't tried it and so I can't guarantee it would work, I will definitely go that direction if I make this again, since this was just way too much time and effort for a side dish!  That said, they certainly were tasty potatoes - the honey and whiskey added really amazing flavor, and the potatoes turned out an excellent soft texture.  The one benefit of using this method rather than roasting is that you don't use much fat at all - just a spritz in the pan before frying - which certainly wouldn't be the case if you were doing high-heat roasting.

Honey-Whiskey Sweet Potatoes (adapted from Salad Days)
Serves 3

1-1/4 pounds sweet potatoes, scrubbed
1/4 cup honey
1 T whiskey
Oil spray
Salt and pepper

1. Add the yams to a pot of boiling, salted water and cook until just tender.  (If the yams are small, you can cook them whole; if you're using one large yam, you'll need to cut it into a few more manageable pieces.)
2. Drain the potatoes and run under cold water.  Slip off the skins, place on a plate, and chill in the refrigerator until cold, at least 1 hour.
3. Preheat the oven to 200 degrees.
4. Slice the yams into 1/4-inch thick slices.
5. Whisk together the honey and whiskey in a shallow dish.  (If the honey is too thick, you can warm it in the microwave for about 10 seconds.)
6. Heat a nonstick pan over medium heat, and prepare a cookie sheet by lining it with foil.  Spray the pan with oil.
7. Dip the potatoes into the honey-whiskey mixture and carefully transfer to the hot pan.  Season with salt and pepper, and then cook about 1 minute on each side, until browned.  Transfer to the foil-lined baking sheet.  Work in batches, wiping out the pan and spraying with oil before starting each batch. 
8. Lightly brush the tops of the yams with any remaining honey-whiskey mixture.  Place in the oven and bake 30 minutes. 

Monday, May 16, 2011

Crisp and Spicy Roasted Chickpeas with Lamb

This past month I joined the Secret Recipe Club, which was a lot of fun - the idea is that you get randomly assigned another blogger in the group, and choose a recipe from their blog to try out.  I was assigned Bite Me New England, which had lots of delicious options to choose from!  I ended up selecting this fantastic roasted lamb-and-veggie dish, which was really delicious.  It combines roasted ground lamb with crispy roasted chickpeas, green beans, onions, and zucchini (my addition, because I had some extra to use up!).  Then everything is tossed with an orange reduction, which goes perfectly with the smoky cumin that's roasted in with the veggies.  Definitely a winner!  I served this dish as-is, but it would also be great alongside some couscous or with a dollop of Greek yogurt on top.  My friend Devin brought along a tasty Syrah, which he claims is "the lamb of wines", and so it was a terrific match to this dish!


Crisp and Spicy Roasted Chickpeas with Lamb (adapted from Mark Bittman, via Bite Me New England, original recipe here)
Serves 2

1 can chickpeas, drained, rinsed, and patted dry
Canola oil
Salt and pepper
1/3 pound ground lamb
1/2 sweet yellow onion, cut into thick slices
4 ounces green beans, trimmed
1 small zucchini, cut into bite-sized pieces
2 garlic cloves, minced
Grated zest of 1/2 orange
1-1/2 tsp cumin
Cayenne pepper, to taste
Juice of 1 orange
Olive oil

1.  Preheat the oven to 400 degrees.  Toss together the chickpeas with a good glug of olive oil and some salt and pepper.  Spread evenly on a half-sheet pan nad bake, shaking the pan once or twice, until crisp and browned, 15-20 minutes.  Remove from pan and set aside.
2. Add a bit more oil, along with the lamb.  Break up the lamb a bit and roast until it is no longer pink and is starting to become crispy, about 10 minutes.
3. Add the onions, green beans, zucchini, garlic, orange zest, cumin, and cayenne to the lamb, and season with salt and pepper.  Return the pan to the oven and continue to roast until the veggies are tender and the lamb is very crispy, 10-15 minutes.  Remove the pan from the oven and toss the veggies with the chickpeas in a serving dish.
4. Place the roasting pan on the stove top over medium heat. Add the orange juice and cook, stirring and scraping any brown bits from the bottom of the pan, until reduced by about half, 5-10 minutes.  Toss the orange reduction with the lamb and chickpeas, along with a little olive oil if things are looking dry. Taste and adjust for seasoning.

Wine pairing of the night: Syrah.


Friday, May 13, 2011

Chili-Corn Muffins

When I made Midwestern Enchiladas, I knew I wanted to make cornbread alongside it.  As I was flipping through Baking: From My Home to Yours, I noticed two corn muffin recipes that sounded terrific, so I combined the main recipe from one with the spices from the other!  I'd actually add more spices if I made these again - both the chili powder and the black pepper could be quite a bit stronger in flavor (maybe as much as twice as much of each).  In any case, these muffins were moist and delicious, and I loved the addition of actual corn to them - definitely makes them extra tasty!  They were also excellent the next morning, split in half, toasted, and spread with butter.


Chili-Corn Muffins (adapted from Dorie Greenspan's Baking: From My Home to Yours)
Makes one dozen muffins

1 cup all purpose flour
1 cup cornmeal
6 T sugar
2 1/2 tsp baking powder
1 tsp chili powder (or more if you want the muffins spicier)
1/2 tsp salt
1/4 tsp baking soda
1/4 tsp freshly ground black pepper
1 cup buttermilk
3 T butter, melted and slightly cooled
3 T vegetable oil
1 egg
1 egg yolk
1 cup frozen corn

1. Preheat the oven to 400 degrees and line a muffin tin with papers.
2. Whisk together the flour, cornmeal,  sugar, baking powder, chili powder, salt, baking soda, and pepper in a large bowl and set aside.
3. Combine the buttermilk, butter, oil, egg, and yolk in a liquid measuring cup and whisk well to combine.  Pour the wet ingredients into the dry ingredients and mix together with a rubber spatula, being careful not to over mix.
4. Add the corn and gently stir in until just combined.
5. Divide batter among 12 muffin cups and bake for 15-18 minutes, until the muffins are nicely browned on top and a tester comes out clean.

Tuesday, May 10, 2011

Midwestern Enchiladas

I don't know how I've never managed to post this recipe before, because it is one of my absolute favorite recipes of my mom's.  It may not be (at all) authentic, but it definitely tastes like home to me -- and it's been approved by non-Midwesterners as well as being totally delicious!  This is sort of a not-so-spicy enchilada casserole, and you should feel free to change it up however you like - make it vegetarian by leaving out the chicken (as we usually do), use refried beans if you prefer, and substitute any veggie you like for the zucchini (we usually use spinach, sauteed or frozen and then squeezed dry).  If you do change up the veggie, just make sure to remove as much liquid as possible if it's a water-y veggie to avoid soggy enchiladas.  I could imagine using roasted sweet potatoes, bell peppers, or summer squash as well, though I haven't tried it.  All of the amounts listed here are guidelines - you can vary the amount of the various filling ingredients according to your taste and to the size of tortillas you use.  In any case, this is very satisfying comfort food that will put a smile on your face!  Creamed corn or cornbread makes an excellent side dish.


Midwestern Enchiladas
Makes 1 9x13 pan, serving 4ish (more if you're not so hungry)

1 (15 ounce) can black beans
1 tsp cumin
1/2 tsp dried oregano
3/4 pound chicken (breasts or thighs)
Salt and pepper
Canola oil
1 (29 ounce) can tomato sauce (unseasoned)
10 corn tortillas, warmed in microwave until softened
1 jar medium-spicy salsa (your favorite flavor, but nothing too fancy)
1 small zucchini, grated (or, 4 ounces frozen spinach, thawed and squeezed dry)
4 ounces grated mozzarella cheese
4 ounces grated cheddar cheese
Sour cream, to serve
1 avocado, cut into chunks, to serve

1. Drain and rinse the beans.  Place in a small bowl and add the cumin and oregano.  Mash lightly with a fork to incorporate the spices into the beans.
2. Season the chicken with salt and pepper.  Heat some oil in a skillet over medium heat, and saute the chicken until cooked through.  Let cool slightly, and then chop into small pieces.
3. Preheat the oven to 350 degrees.
4. Spoon a little tomato sauce into the bottom of a 9x13 pan to cover it in a thin coat of sauce.  Then, start building the enchiladas.  With a corn tortilla in one hand, use the other hand to put in the filling - a little bit each of tomato sauce, salsa, beans, chicken, zucchini, and mozzarella cheese.  Then, roll the tortilla up tightly and place into the pan.  You should be able to fit 8 tortillas side-by-side along one long side of the pan, with the remaining two facing the other way to fill in the gap along the other long side of the pan.
5. Smother the enchiladas with most of the remaining tomato sauce - you may have a bit extra.  Top with a generous amount of salsa, and spread everything around with a spoon so that no part of the enchiladas is uncovered.  Top with grated cheddar cheese.
6. Bake until the sauce is bubbling vigorously and the cheese is melted.  Let sit out of the oven for about 5 minutes before serving.  Serve with sour cream and chunks of avocado.

Saturday, May 7, 2011

Chocolate Chunk-Orange Muffins

I woke up this morning absolutely in the mood for muffins, and I found this super easy and relatively healthy recipe online.  It was a particularly good choice since I have tons of oranges around the house!  Although the original recipe claimed that one orange would be enough, I ended up using 2 medium oranges and one really big tangerine to get enough juice.  


These muffins have a delicate texture despite using half whole wheat flour - as is often the case, my secret weapon is white whole wheat flour, which works perfectly in this recipe since you don't want to develop the gluten much anyway (and whole wheat flour is lower in gluten).  The orange zest and juice add a terrific flavor and aroma, and the bursts of chocolate throughout the muffins make them feel a little bit decadent.  Although I think chocolate and orange make the perfect flavor pairing, you could definitely change up the mix-ins here - the original recipe called for cranberries and walnuts, and I could also see filling each cupcake with a bit of stewed rhubarb or strawberry jam. 


Chocolate Chunk-Orange Muffins (adapted from Cooking Light, via Serious Eats)
Makes one dozen muffins

1 cup all purpose flour
1 cup white whole wheat flour
1 cup sugar
1-1/2 tsp baking powder
1 tsp salt
1/2 tsp baking soda
1 T orange zest (from about 3 oranges)
3/4 cup freshly squeezed orange juice (from about 3 oranges)
1/4 cup canola oil
1 egg
3/4 cup coarsely chopped bittersweet chocolate

1. Preheat the oven to 400 degrees and line a muffin tin with paper wrappers.
2. Whisk together the flours, sugar, baking powder, salt, and baking soda in a large bowl.
3. Combine the orange zest, orange juice, oil, and egg in a liquid measuring cup and whisk to combine.
4. Add the wet ingredients to the dry and fold together with a rubber spatula until just combined.  Add the chocolate and gently fold into the batter.
5. Divide the batter among the muffin cups and bake until a tester comes out clean, about 15 minutes.  Serve warm.

Tuesday, May 3, 2011

Zucchini-Sweet Potato Quick Bread

I had a surplus of both zucchini and sweet potatoes, and so I decided this quick bread was just the thing to bake!  It's definitely one of the best quick breads I've ever made - moist, just sweet enough, and a bit caramelized around the edges with bursts of yummy golden raisins throughout.  It's also perfectly spiced with cinnamon, nutmeg, and a little kick of cardamom - one of my favorite spices.  Don't be afraid to let this get dark around the edges - it won't taste burned at all, but rather sweet and caramel-y!  This is definitely not the healthiest treat - despite the whole wheat flour and two types of veggies, it has quite a lot of oil and sugar.  You could substitute applesauce for some of the oil and cut the sugar if you like, but I think this bread is pretty perfect just as it is!


Zucchini-Sweet Potato Quick Bread (adapted from Joy the Baker, original recipe here)
Makes 2 loaves

1-1/2 cups all purpose flour
1-1/2 cups white whole wheat flour
1 T cinnamon
1/2 tsp nutmeg
1/2 tsp cardamom
1-1/2 tsp baking soda
1/ tsp baking powder
1/2 tsp kosher salt
1-1/2 cups white sugar
1-1/2 cups packed brown sugar
4 eggs
1 egg white
1 cup canola oil
2 T butter, melted and cooled slightly
1-1/2 tsp vanilla
2-1/4 cups shredded zucchini
2-1/4 cups peeled and shredded sweet potatoes
1 cup golden raisins

1. Preheat oven to 350 degrees and oil two loaf pans.
2. Whisk together the flours, spices, baking soda, baking powder, and salt. Set aside.
3. Beat together the sugars, eggs, egg white, oil, butter, and vanilla. Add the zucchini and sweet potatoes and stir together with a rubber spatula. Add the raisins and stir to combine.
3. Add the dry ingredients to the wet ingredients and fold together with a rubber spatula until just combined.
4. Divide the batter among the two loaf pans. Place the pans on a cookie sheet large enough to hold them, and then bake for 1 hour and 20 minutes, or until a tester comes out clean.