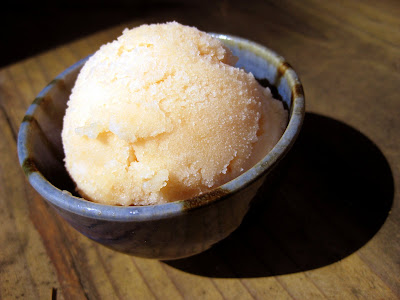
Wednesday, April 29, 2009

Rotini and Asparagus with Roasted Red Pepper Sauce

This pasta dish is incredibly colorful and flavorful, and also really quick to pull together--just my style! Roasted red peppers and just a little cream combine to make an unusual and delicious sauce, and the asparagus adds even more color and some textural contrast to the the pasta.

Of course you can roast the peppers yourself, but I just got mine from the olive bar at the supermarket and it worked out perfectly. (I've only roasted peppers myself once, and it didn't go very well--perhaps someday I'll tackle it again!) If you do roast your own peppers, you might want to reduce the number as I think they'd end up larger than the type you typically get at the store. The jarred variety would probably also work well.

I used pencil asparagus as my other veggie in this dish, both because it was on sale and because I knew it would roast quickly (i.e. in the time it took to make the sauce!). You could definitely use larger asparagus; just peel it and leave more time to roast. I think other veggies like broccolini would also be great--anything that you think would taste good with roasted red pepper.

Rotini and Asparagus with Roasted Red Pepper Sauce (adapted from The Pioneer Woman Cooks, original recipe here)

4-5 roasted red peppers
2 T pine nuts, lightly toasted
1/2 cup heavy cream
3/4 - 1 pound rotini or another medium-sized pasta
1 large bunch pencil asparagus
Olive oil
Salt and pepper
1 small onion, diced
3 cloves garlic, minced
Freshly grated hard cheese (such as Parmesan, Asiago, etc.), to serve

1. Preheat the oven to 400 degrees.
2. Place the roasted peppers, pine nuts, and heavy cream in a blender or food processor. Puree until very smooth. Reserve for later.
3. Bring a large pot of water to a boil, and cook the rotini until just shy of al dente.
4. Meanwhile, wash and trim the asparagus. Cut into 1-inch segments. Toss with olive oil and season with salt and pepper. Place the asparagus on a rimmed baking sheet and roast until crisp-tender and slightly caramelized. Be sure to check the asparagus often, as this thinner variety cooks very quicky.
5. Heat some olive oil in a large skillet over medium heat. Add the onion and saute until it just begins to soften. Add the garlic, and continue to saute until everything is nicely browned.
6. Reduce the heat to low, and add the roasted red pepper sauce and drained pasta. Toss until the pasta is al dente. Then toss in the asparagus and heat for just one minute more until everything is nicely heated through. Season to taste with salt and pepper. Serve with a light sprinkling of grated cheese.

I'm submitting this post to this week's Presto Pasta Nights. Be sure to check out the other entries at Once Upon a Feast on May 1.

Monday, April 27, 2009

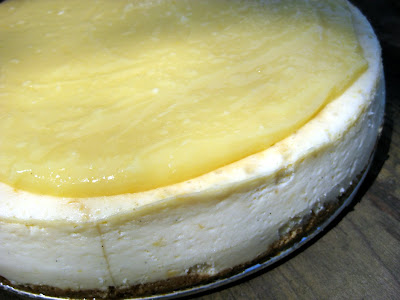
April Daring Bakers: Meyer Lemon-Coconut Cheesecake

The April 2009 challenge is hosted by Jenny from Jenny Bakes. She has chosen Abbey's Infamous Cheesecake as the challenge. We were given total freedom over playing around with flavors, and so I went with Meyer lemon and coconut. These seemed like the perfect flavors for Easter, plus our lemon tree was overflowing with lemons.

Let me tell you, this was one amazing cheesecake! I used crispy lemon cookies in the crust, lemon juice and lemon zest in the filling, and lemon curd spread on top, so the lemon flavor came through really well. The coconut flavor was much more subtle, although I used toasted coconut in the crust and coconut milk in the filling. Nonetheless, I did think that the coconut milk mellowed things out and balanced the filling. I'd like to try an all-coconut cheesecake sometime, as I think all the lemon may have just overpowered the coconut.

Meyer Lemon-Coconut Cheesecake

Crust:
90 g crispy lemon cookies (about 1 cup crumbs)
1 cup toasted unsweetened coconut
1/2 stick butter, melted
2 T sugar
1/2 vanilla bean, scraped

Filling:
3 sticks of cream cheese, 8 oz each (total of 24 oz) room temperature
1 cup sugar
3 large eggs
1 cup coconut milk (shake well before measuring)
3 T Meyer lemon juice
2 T Meyer lemon zest
1/2 vanilla bean, scraped

Topping:
Store-bought or homemade lemon curd

1. Preheat oven to 350 degrees.

2. Mix together the crust ingredients and press into your preferred pan (I used a 9-inch springform pan). You can press the crust just into the bottom, or up the sides of the pan too - baker's choice. Set crust aside.

3. Combine cream cheese and sugar in the bowl of a stand-mixer (or in a large bowl if using a hand-mixer) and cream together until smooth. Add eggs, one at a time, fully incorporating each before adding the next. Make sure to scrape down the bowl in between each egg. Add coconut milk, vanilla, lemon juice, and zest and blend until smooth and creamy.

4. Pour batter into prepared crust and tap the pan on the counter a few times to bring all air bubbles to the surface. Place pan into a larger pan and pour hot water into the larger pan until halfway up the side of the cheesecake pan. If cheesecake pan is not airtight, cover bottom securely with foil before adding water.

5. Bake 45 to 55 minutes, until it is almost done - this can be hard to judge, but you're looking for the cake to hold together, but still have a lot of jiggle to it in the center. You don't want it to be completely firm at this stage. Close the oven door, turn the heat off, and let rest in the cooling oven for one hour. This lets the cake finish cooking and cool down gently enough so that it won't crack on the top. After one hour, remove cheesecake from oven and lift carefully out of water bath. Let it finish cooling on the counter, and then cover and put in the fridge to chill. Once fully chilled, top with lemon curd and serve.

Please make sure to check out all the other fantastic cheesecakes at The Daring Kitchen. You can find the original recipe for the cheesecake at Jenny Bakes. Here are a few of my favorites:

Raspberry Chocolate Mini Cheesecakes
Chocolate-Peanut Butter Cheesecake (plus two others)
Cheesecake with Coconut Crust
Pineapple Upside Down Cheesecake
White Chocolate and Blackberry Cheesecake
Fresh Mango Cheesecake
Pear Cardamom Cheesecake
Margarita Cheesecake with Pretzel Crust (plus three others)
Cheesecake made in the food processor
Bulls Eye Cheesecake
Peanut Butter-Chocolate Swirl Cheesecake
Pina Colada Cheesecake
Strawberry Cheesecake Ice Cream
Savory Camembert and Blue Cheese Cheesecakes

Saturday, April 25, 2009

Strawberry Cupcakes

I've been meaning to make strawberry cupcakes for a long time, but never actually managed to make it happen until Easter. The cupcakes were tender and moist, and had an excellent strawberry flavor--perfect for spring! They use a different creaming method than most cakes, which made them a bit more dense but also more tender. Next time I might beat the egg whites separately and fold them in at the end to add a little lift. The only disappointment was that they sunk quite a bit after coming out of the oven, but of course frosting covers all faults.

I tried to make a meringue frosting for these cupcakes, but it came out way too drippy, so I ended up just whipping up some cream with a bit of sugar. I used superfine sugar, but if you don't have that you can easily substitute confectioner's sugar or regular sugar. Just taste along the way to get it to the proper sweetness. Although the whipped cream frosting was tasty and super easy, I think these cupcakes might be better with a heftier frosting like an American buttercream.

Strawberry Cupcakes (adapted from Sky High: Irresistible Triple-Layer Cakes and Smitten Kitchen)
Makes 36 cupcakes

4 1/2 cups cake flour
3 cups sugar
5 1/4 teaspoons baking powder
3/4 teaspoon salt
3 sticks unsalted butter, at room temperature
1 1/2 cups pureed frozen strawberries
8 egg whites
2/3 cup milk
1 to 2 drops red food dye, optional
1 to 1 1/2 cups heavy cream
1 1/2 tsp superfine sugar, more to taste
Sprinkles, to decorate (optional

1. Preheat the oven to 350 degrees. Line three cupcake pans with paper wrappers.

2. Put the flour, sugar, baking powder, and salt in a large mixer bowl. With the electric mixer on low speed, blend for 30 seconds. Add the butter and strawberry puree and mix to blend the ingredients (be sure to cover your mixer bowl with a towel during this step). Raise the speed to medium and beat until light and fluffy, 2 to 3 minutes; the batter will resemble strawberry ice cream at this point.

3. In another large bowl, whisk together the egg whites, milk and red food coloring. Add the whites to the batter in two or three additions, scraping down the sides of the bowl well and mixing only to incorporate after each addition. Divide the batter among the cupcake pans.

4. Bake until a cake tester or wooden toothpick inserted into the center comes out clean (about 20 minutes?).

5. Allow the cupcakes to cool completely. Then whip the heavy cream along with the sugar until stiff peaks form. Add more sugar to taste. Frost the cupcakes and top with sprinkles, if desired.

Note these adorable Easter cupcake papers from my Mom!

Thursday, April 23, 2009

Raspberry Gelato

This raspberry gelato is dead easy and totally addictive. Plus, with only a half cup of cream, it's actually not too bad for you! The gelato is pretty tart, so add more sugar if you want a sweeter dessert; I liked it with a little edge. It does freeze a bit hard, so make sure to take it out of the freezer a few minutes before you plan to serve dessert, or pop the gelato in the microwave for about ten seconds before digging in.

Raspberry Gelato (adapted from My First Kitchen)

10-12 oz. bag of frozen, unsweetened raspberries, fully thawed
1/3 cup sugar, or more to taste
1/2 cup heavy cream

Place all the ingredients in a blender (or a food processor). Blend until very smooth. Strain the mixture through a fine sieve into a 2-cup measuring cup, and chill until cold. Freeze in your ice cream maker. Pop the gelato in the freezer for a couple of hours to firm up, and then enjoy!

Monday, April 20, 2009

Foodie Fight #1: Gnocchetti with Meyer Lemon Cream Sauce and Crispy Sage

This post is my entry for the first ever Foodie Fight! This battle pits six food blogs against each other in a contest to cook up a special dish featuring two secret ingredients. The battle is over, but you can see the results at the Foodie Fight website: I got third place! :)

The secret ingredients for this battle were potatoes and lemons. I had a baked good all planned out, but then our oven broke! However, I think I ended up with something even better that didn't need the oven. I chose to make potato gnocchetti (mini gnocchi) with a creamy Meyer lemon sauce. I'm not going to lie--the gnocchetti were a huge pain to make, and I'm not one for fussy preparation. I made about one serving of the mini gnocchi, and then made the rest normal sized! However, if you're more patient than me, the gnocchetti were absolutely delicious...delicate, full of potato flavor, and absolutely amazing with the cream sauce.

The Meyer lemon cream sauce was very easy to make, and so yummy. I was a little worried about the cream curdling because of the lemon, but either the gin or the heat must have prevented that because the sauce was absolutely perfect. I would definitely try it again with either normal-sized gnocchi or pasta. It's very rich, though, so this dish is best in small portions as a first course.

Gnocchetti (adapted from Gourmet, original recipe here)
Makes 4 appetizer servings

3/4 lb yellow-fleshed potatoes such as Yukon Gold
3/4 cups all-purpose flour plus additional for dusting
1/2 tsp salt
Butter, to saute

1. Cover potatoes with salted cold water by 2 inches in a large pot, then simmer, uncovered, until very tender, about 25 minutes. Drain in a colander and, when cool enough to handle, peel.

2. Force warm potatoes through ricer or fine sieve into a large bowl. Add flour and salt and stir with a wooden spoon until mixture begins to come together. Gently form dough into a ball.

3. Knead the dough on a floured surface until smooth, about 1 minute (if dough sticks to surface, dust lightly with additional flour). Cut evenly into 10 pieces. Roll 1 piece into a 14-inch-long rope (1/2 inch thick)rope 1/2 inch thick, keeping the remaining pieces covered with a kitchen towel. Cut the rope crosswise into 1/4-inch pieces and toss the pieces lightly with flour on work surface.

4. Press a piece of dough against tines of a floured fork and push in a forward rolling motion toward end of the tines, letting gnocchetti fall from the fork into a well-floured shallow baking pan. Make more gnocchetti in same manner.

5. Just before cooking, gently shake gnocchetti in 2 batches in a large medium-mesh sieve to knock off excess flour. Cook gnocchetti in 2 batches in a 5- to 6-quart pot of boiling salted water until they float, about 1 minute. Transfer with a slotted spoon to a large shallow bowl.

6. Melt some butter in a large skillet. Add the gnocchetti and sautee until lightly browned. Transfer to four bowls and toss gently with the Meyer lemon cream sauce. Top with a crispy sage leaf.

One-inch pieces of dough ready to be cut into quarters.

Meyer Lemon Cream Sauce (adapted from Fine Cooking)

Kosher salt
2 Meyer lemons
1 cup heavy cream
1/3 cup gin
Freshly ground black pepper

1. Finely grate the zest of one of the lemons; set aside. Cut a thick slice off both ends of the zested lemon to expose the flesh. Stand the fruit upright, then cutting from the top down, remove the peel, including all the white pith. Holding the fruit over a bowl to catch the juice, use a paring knife to cut along either side of each segment to free it from the membranes; let each segment fall into the bowl as you go. Once you’ve removed all the segments, squeeze any juice from the membranes into the bowl and then discard. Remove the seeds and set the segments aside in another small dish. Measure the juice in the bowl. Cut the remaining lemon in half and squeeze to obtain 2 T juice total.

2. In a 12-inch skillet over medium heat, place the cream, gin, and lemon segments and bring just to a boil. Lower the heat and simmer until the cream thickens slightly, 5 to 8 min. Remove from the heat.

3. Add the lemon juice to the sauce, along with the grated lemon zest. Season to taste with salt and pepper, and then toss with the gnocchetti.

Teeny gnocchetti shaped and ready to be cooked.

Crispy Sage

Canola oil
4 sage leaves

Heat about 1 inch of oil in a small skillet. When the oil is hot enough to bounce a drop of water, very carefully add the sage leaves. Stand back in case the oil sputters! When the sage just starts to brown, turn off the heat and carefully remove the sage with a fork. Place the sage on a paper towel to drain off some of the oil.

Friday, April 17, 2009

Dried Strawberry-Lemon Thyme Shortbreads

These little shortbread cookies are very easy to make and they result in a sophisticated, tasty dessert. I brought them to church for Easter morning, because our church has a cookie potluck after the service, during coffee hour. The cookies are nice and tender, just like you'd want a shortbread cookie to be, the strawberries add a tart little punch, and the lemon thyme lends a subtle floral note. They're also quite pretty to look at, and seem just perfect for spring! If you can't find dried strawberries, you can always make your own if you click through to the original recipe at Tartelette. I used a variety that was very crunchy and broke up easily as the pieces were mixed into the dough; if you use the moister, chewier kind, you'll want to chop them up first.

Dried Strawberry-Lemon Thyme Shortbreads (adapted from Tartelette, original recipe here)

1 cup dried strawberries
1 stick butter butter at room temperature
1/4 cup sugar
2 egg yolks
1 1/2 cups all purpose flour
2 teaspoons fresh chopped lemon thyme
pinch of salt
1/2 tablespoon of milk

1. In a stand mixer, beat together the butter and sugar until pale and creamy. Add the egg yolks, one at a time, beating well after each addition. Add the flour, thyme, dried strawberries, pinch of salt and the milk and beat until the ingredients are just starting to come together. Stop the mixer and finish mixing the dough with your hands on a work surface.
2. Roll the dough into a log about 1 1/2 inches in diameter. Cover with plastic wrap and refrigerate at least 30 minutes (overnight is best).
3. Preheat the oven to 350 degrees. Slice the cookies about 1/4 inch thick. Arrange them on a baking sheet and bake the cookies for 8-10 minutes or until just golden brown around the edges (don't overcook or the strawberries will burn).

I'm entering my photo from this post in this month's CLICK contest for food photography.  I'm also sending it off to the Cookie Party at the Secret Recipe Club.

Tuesday, April 14, 2009

Orange-Fennel Salad

This orange-fennel salad is super easy and has amazing flavor. Sweet oranges, crispy fennel, and just a bit of dressing make for a fantastic combination with a few ingredients. We enjoyed it as an accompaniment to this soup, but it would also be a refreshing side dish at a summer barbecue. The salad is best fresh and crispy, but it keeps relatively well to the next day and is still tasty if a bit less crunchy. Be sure to cut the fennel into very thin slices as it is served raw.

Orange-Fennel Salad (from Moosewood Cooks at Home)
Serves 4

2 fennel bulbs, washed, trimmed of any bruised leaves
4 oranges
Juice of 1 lemon
2 T extra-virgin olive oil
Salt and pepper, to taste

1. Slice each fennel bulb in half and remove the core. Very thinly slice the fennel and place it in a salad bowl.
2. Peel and supreme the oranges, reserving any juice. Add the orange slices and any juice to the fennel.
3. Whisk together the lemon juice and olive oil in a small bowl, and then drizzle over the fennel and orange slices. Gently toss, and then season to taste with salt and pepper.

Sunday, April 12, 2009

Happy Easter!

i thank You God for most this amazing
day:for the leaping greenly spirits of trees
and a blue true dream of sky;and for everything
which is natural which is infinite which is yes

(i who have died am alive again today,
and this is the sun’s birthday;this is the birth
day of life and love and wings:and of the gay
great happening illimitably earth)

how should tasting touching hearing seeing
breathing any–lifted from the no
of all nothing–human merely being
doubt unimaginable You?

(now the ears of my ears awake and
now the eyes of my eyes are opened)

--e. e. cummings

Saturday, April 11, 2009

Cantaloupe Sorbet

This cantaloupe sorbet is the perfect taste of summer-to-come, so it's the perfect pick-me-up when the weather is a bit gloomy. Cantaloupe is an excellent flavor for a sorbet rather than an ice cream because it has a more subtle flavor that might be lost under a creamy custard. Instead, this sorbet tastes perfectly of cantaloupe. It's refreshing, and also a reasonably healthy dessert. The ice cream maker whips enough air into the mixture to make the texture creamy and smooth; you won't miss the cream at all.

Now I'm off to start a day of Easter baking. You can check back for recipes and photos soon: my super-secret Daring Bakers challenge (post going up April 27), a strawberry cake with lemon thyme frosting, sunflower bread, and strawberry-lemon thyme cookies.

Cantaloupe Sorbet (from The Perfect Scoop by David Lebowitz)
Makes about 1 pint

1 ripe cantaloupe (about 2 pounds)
1/2 cup sugar
Pinch of salt
1 tsp lime juice, more to taste
2 T white wine (optional)

1. Split the melon in half and scoop out the seeds. Scoop the flesh from the rind and place it in a blender. Add the remaining ingredients except the wine, and blend until very smooth. Taste, and add more lime juice and the wine if desired.

2. Chill the mixture thoroughly, and then freeze according to your ice cream maker's instructions. Pop the sorbet in the freezer for a couple of hours to firm up before serving.

Wednesday, April 8, 2009

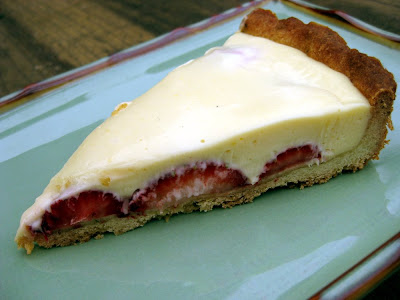
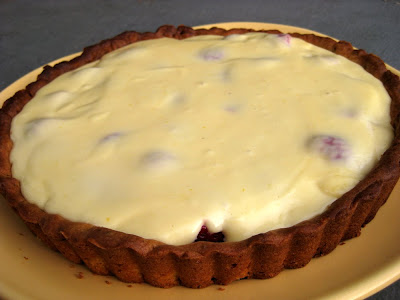
Meyer Lemon-Strawberry Spring Tart

The theme for this month's You Want Pies with That? is "Lifestyles of the Rich and Famous." We could draw our inspiration from any famous person, and I chose Amy Adams. She's going to be playing Julie in the upcoming cooking movie Julie & Julia, which I can't wait for because I loved the book. Adams also played Giselle in Enchanted, and so I wanted to make a pie fit for a princess. :) I also wanted to do a pie with Meyer lemons and strawberries because those are both plentiful here at the moment, and they're also so delicious together. I thought they would make the perfect pie for Amy Adams since she has strawberry blonde hair (strawberries + lemon...sort of works, right?).

After reading about this Strawberry and Lemon Curd Galette in Thyme Crust on Dishing Up Delights, I knew I wanted to do a thyme crust for my tart, so I combined the flavors of strawberries, lemons, and lemon thyme with Dorie Greenspan's famous lemon cream tart. The result was amazing! We pretty much demolished the tart in an evening, although I saved out a slice to photograph in natural light the next morning. The lemon cream was absolutely delicious, and the sweet berries cut the tartness of the lemon filling nicely. Dorie's shortbread tart crust is always a winner, although I couldn't really taste the lemon thyme; next time I'd add twice as much (4 teaspoons). If you can't find lemon thyme, feel free to substitute regular thyme or another herb.
Meyer Lemon-Strawberry Spring Tart (inspired by Dorie Greenspan and Dishing Up Delights)
Serves 4-5

1 Lemon Thyme Shortbread Crust, fully cooked (recipe below)
1/2 cup sugar
Finely grated zest of 2 Meyer lemons
2 large eggs
6 T freshly squeezed Meyer lemon juice (from about 3 lemons)
1 stick plus 2 T unsalted butter, at room temperature and cut into tablespoon-sized pieces
1-2 pints strawberries (depending on the size of the strawberries)
Getting ready: Have a thermometer, preferably an instant-read, a strainer and a blender (first choice) or food processor at the ready. Bring a few inches of water to a simmer in a saucepan.
1. Put the sugar and zest in a large metal bowl that can be fitted into the pan of simmering water. Off heat, work the sugar and zest together between your fingers until the sugar is moist, grainy and very aromatic. Whisk in the eggs followed by the lemon juice.
2. Fit the bowl into the pan (make certain the water doesn’t touch the bottom of the bowl) and cook, stirring with the whisk as soon as the mixture feels tepid to the touch. You want to cook the cream until it reaches 180°F. As you whisk the cream over heat—and you must whisk constantly to keep the eggs from scrambling—you’ll see that the cream will start out light and foamy, then the bubbles will get bigger, and then, as the cream is getting closer to 180°F, it will start to thicken and the whisk will leave tracks. Heads up at this point—the tracks mean the cream is almost ready. Don’t stop whisking and don’t stop checking the temperature. And have patience—depending on how much heat you’re giving the cream, getting to temp can take as long as 10 minutes.
3. As soon as you reach 180°F, pull the cream from the heat and strain it into the container of a blender (or food processor); discard the zest. Let the cream rest at room temperature, stirring occasionally, until it cools to 140°F, about 10 minutes.
4. Turn the blender to high and, with the machine going, add the butter about 2 T at a time. Scrape down the sides of the container as needed while you’re incorporating the butter. Once the butter is in, keep the machine going—to get the perfect light, airy texture of lemon-cream dreams, you must continue to beat the cream for another 3 minutes. If your machine protests and gets a bit too hot, work in 1-minute intervals, giving the machine a little rest between beats.
5. Set the blender aside while you prepare the strawberries. Wash and dry the strawberries. Cut the top off each strawberry and slice in half, placing the cut side down on a paper towel to ensure that the wet centers don't get the crust soggy. Arrange the strawberries in concentric circles on the cooled tart crust.
6. Whirl the lemon cream in the blender for a few seconds to loosen it up, and then carefully pour it over the strawberries. Use the back of a rubber spatula to spread out the cream so it covers all of the berries.
7. Chill the tart in the refrigerator for a few hours before serving.

Lemon Thyme Shortbread Crust (adapted from Dorie Greenspan)
1 1/2 cups all purpose flour
1/2 cup confectioners' sugar
1/4 tsp salt
2 tsp lemon thyme, leaves only (no need to chop; the food processor will do it for you)
1 stick plus 1 T very cold (or frozen) unsalted butter, cut into small pieces
1 large egg yolk

1. Put the flour, confectioners' sugar and salt in a food processor and pulse a couple of times. Scatter in the lemon thyme and the pieces of butter and pulse until the butter is coarsely cut in--some pieces the size of oatmeal flakes and some the size of peas. Stir the yolk to break it up, then add it a little at a time, pulsing after each addition. When the egg is in, process in long pulses--about 10 seconds each--until the dough forms clumps and curds. (The sound of the food processor will change just before the dough is ready.) Turn the dough out onto a work surface and knead very lightly, just to incorporate any stray dry ingredients.

2. Butter a 9-inch tart pan or pie plate and press the dough evenly over the bottom and sides. Use all but a little piece of dough, which you should store in the fridge to patch up any cracks later. Freeze the crust for at least 30 minutes or longer.

3. Preheat the oven to 375 degrees. Cover the crust with a piece of buttered aluminum foil (butter side down) and fit the foil tightly around the crust. Put the tart/pie pan on a baking sheet and bake 25 minutes. Remove the foil and flatten out the crust gently with the back of a spoon. Mine melted a little, so I just pushed it back up the sides and it wasn't a problem. Patch the crust if necessary with the dough from the fridge.

4. Return the crust to the oven and bake for another 8 minutes until golden brown. Transfer to a rack and cool to room temperature.
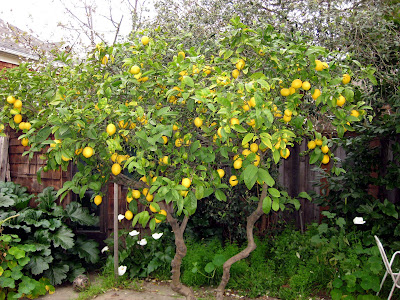
Do you need any Meyer lemons? We have too many to use!

I'm sending this pie off to Katherine Martinelli's Strawberry Blog Hop.

Monday, April 6, 2009

Maple-Oatmeal Bread

Life's Too Short for Mediocre Chocolate is one of my favorite sources for delicious and unique sandwich breads. This recipe for Maple-Oatmeal Bread definitely did not disappoint. It's very easy to pull together, and the addition of vital wheat gluten and dry milk makes it light and fluffy despite the whole wheat flour. The maple flavor really comes through and the bread is a bit sweet, so I'd recommend it for breakfast toast or peanut butter-and-jelly rather than cold cuts.

Maple-Oatmeal Bread (from Life's Too Short for Mediocre Chocolate)

Soaker:
1 cup rolled oats
1 1/3 cups boiling water

Wet Ingredients:
1/4 cup pure maple syrup
1 T brown sugar
3 T melted butter

Dry Ingredients:
1 1/2 cups bread flour
1 cup white whole wheat flour
2 T vital wheat gluten
1 T dry milk powder
2 1/4 tsp active dry yeast
additional 1/4 cup bread flour, as needed
2 tsp kosher or sea salt

1. Soak the oats in the water for 30 minutes.
2. Mix all dry ingredients except the extra bread flour and salt in the mixer bowl.
3. Add the maple syrup, brown sugar, and melted butter to the soaked oats and mix to combine.
4. Check temperature of oat mixture. It should be at about 120 degrees, and feel pretty warm. If it's over 125, wait until it cools down. This is so you don't kill the yeast. Once cooled, add oat mixture to dry ingredients, and mix gently until all flour is moistened. Switch to the dough hook attachment and knead for a minute or two in the bowl.
5. Cover bowl with a towel and let rest 20 minutes.
6. Turn on the mixer on to low speed and sprinkle in salt. Knead 8 minutes, adding bread flour as needed to keep dough from sticking to bottom or sides of bowl. Add it in a tablespoon at a time until dough is smooth and clears the sides and the bottom of the bowl, and is still slightly sticky.
Place dough in oiled container and let rise til doubled in a warm spot, about 40-60 minutes.
7. Gently turn dough out onto a floured surface and press to deflate. Round it into a ball using both hands, and turning the dough in a circular motion. This is called rounding, and is important for even shaping. Cover ball with a towel and let rest 10-20 minutes.
8. Gently press or roll dough into a rectangle that is as wide as your loaf pan is long. Roll up tightly, jelly-roll style, pinching seam and ends together. Place seam-side down in oiled loaf pan, cover with towel and let rise until 1 1/2-2" above rim of pan, 40-60 minutes. Meanwhile, preheat oven to 350.
10. Bake 20 minutes, then turn loaf, tent with foil, and bake another 30-35 until bread is golden brown and sounds hollow when thumped. For a soft crust, brush with butter. Allow to cool most of the way, 30-40 minutes, before slicing or bagging.

Wednesday, April 1, 2009

Off to Chicago!

I'm back from a truly fantastic vacation in Mexico, and now I'm off to Chicago for the Midwest Political Science Association conference...whew, very quick turnaround! No recipe today because I need to finish getting ready to go, but I'll leave you with this photo of me ziplining from my trip. So exciting! I'll be back on Sunday, so expect new posts next week.