Sunday, December 29, 2013

Roasted Cauliflower-Carrot Soup

Hopefully everyone has had a wonderful holiday.  If you need to detox a bit after all the delicious holiday food you've been eating, this soup will fit the bill -- I made it a few weeks ago, but I think it's perfect for the lull between Christmas and New Year's!

This is a recipe I came up with by taking a look at what was left in the fridge and pantry!  Both the carrots and cauliflower were left from a curry recipe earlier in the week, and I wanted to finish them off -- they turned out to be a great combination!  The cauliflower added body to the soup, while the carrots added a great orange color.  If you plan ahead and roast the cauliflower earlier in the week (I threw it in the oven while my curry was cooking), this soup is super simple to pull together - even if you add in the roasting step, it will still be pretty easy.  Aleppo pepper and smoked paprika add that perfect element of smoke and heat that keeps a pureed soup from being too boring.  I topped my soup with Parmesan, but nuts, seeds, or croutons would also be really tasty.  I popped these fluffy dinner rolls in the oven before starting the soup and the timing was perfect -- together, they made a tasty, light dinner.

Note: if you skip the cheese and sub veggie or mushroom broth for the chicken broth, this soup can easily be made vegan!


Roasted Cauliflower-Carrot Soup
Serves 4

1 medium head cauliflower, cut into florets
Oil
Salt and pepper
1/2 medium yellow onion, peeled and chopped
3 large carrots, peeled and chopped
1/2 tsp Aleppo pepper flakes
1/2 tsp smoked paprika
4 cups chicken broth
Grated Parmesan cheese, to serve

1. Preheat the oven to 400 degrees and line a baking sheet with foil.
2. Toss the cauliflower with oil, and season with salt and pepper.  Spread out in an even layer on the baking sheet.  Roast until browned and tender, stirring once, about 15-20 minutes total (check often to make sure the cauliflower does not burn).
3. Heat more oil in a soup pot over medium heat.  Add the onions and cook for about 5 minutes, until starting to soften.  Add the carrots, and continue to cook, stirring occasionally, for another 5 minutes or so.  Add the Aleppo and smoked paprika and stir for one more minute.
4. Add the chicken broth and the roasted cauliflower.  Bring to a boil, and simmer for 15 minutes or so until everything is nicely tender.
5. Puree the soup until super smooth with an immersion blender.
6. Serve topped with grated Parmesan cheese.

Monday, December 23, 2013

Fast and Fluffy Dinner Rolls

Sometimes you find those recipes that are just pure genius - totally different than the way you've made a dish before, but so fantastic that you immediately fall in love.  This roll recipe is definitely one of those.  It's made using hot milk and water, and then the rolls are shaped and popped into a warm oven.  After a quick rise, you turn the oven up and leave the rolls in there while the oven comes up to temperature.  When you pull out the rolls, magic has occurred - they're perfectly browned on top and have gotten huge and fluffy!  I was impressed at how light and fluffy the rolls were despite a short rising time, and I was really impressed at how quickly the whole recipe came together -- if you want rolls for dinner but you haven't planned ahead, this recipe is definitely the way to go!  Of course they're best right out of the oven, but the leftovers were also amazing toasted and spread with jam.


Fast and Fluffy Dinner Rolls (adapted from Jamie Cooks It Up!, original recipe here)
Makes 12 rolls

3/4 cup milk (I used 1%)
6 T butter, divided
3/4 cup very warm water
1/4 cup sugar
1-1/2 tsp kosher salt
4 to 4-1/2 cups all purpose flour
1 heaping T instant yeast

1. Preheat the oven to "warm" or 170 degrees.
2. Combine the milk and 4 T of the butter in a small saucepan.  Heat until the butter is melted and the mixture is just starting to form small bubbles.
3. Add the hot milk mixture to the bowl of a stand mixer with the water, sugar, and salt.  It's fine to use water that is warmer than you would usually use for yeast dough, as you'll be adding flour first to cool things off a bit.  Stir everything together.
4. Add 2 cups of flour and mix for about a minute.  Add another 2 cups of flour along with the yeast.  Mix with a dough hook, adding more flour as needed to reach a soft consistency that just pulls away from the sides of the bowl (it will stick to the bottom).  Mix on low speed for about 5 minutes.
5. Cover the mixture with plastic wrap and let sit 5 minutes.
6. While the dough is resting, spray a work surface with oil.  Then, melt the remaining 2 T butter.  Use about half the butter to generously grease a 9x13 baking pan.
7. With wet hands, turn the dough out onto the oiled work surface.  Divide into 12 pieces - a pair of kitchen shears will do this easily.  If the dough starts to stick to your hands, get them wet again and you shouldn't have too much of a problem.  Don't worry about the dough being very soft and sticky - this is the way it's meant to be!
8. Roll each piece of dough into a small ball, and place in the baking pan.
9. Put the pan into the warm oven, and let rise for 20 minutes -- do not cover with plastic wrap or anything else.
10. After 20 minutes, turn the oven up to 350.  Let the rolls bake for about 15 minutes, checking them often -- they will need more or less time depending on how quickly your oven heats up.
11. When the rolls are a nice golden brown on top, pull them out and immediately brush with the remaining melted butter.  Let cool for about 5 minutes or so, and then eat while warm!

Friday, December 20, 2013

Cranberry Port Jam

Have you left your holiday gift-making to the last minute? Usually I make lots of jams in the summer to give as gifts, but this year I had too much going on and failed to get much canned!  If you're in my boat (or just need a few extras), this cranberry port jam is the answer to your problems.  It's easy to make (at least as jam-making goes) and uses a winter fruit.  Plus, it's extra delicious! I was a little worried the jam would just taste like cranberry sauce, but the port and sugar really take it into jam territory.  I think it would be fantastic on biscuits or dinner rolls, and my friend suggested using it on a turkey sandwich (yum!).  The best part is, this makes six jars, so you'll have some to give and some to keep.

Note: If you're new to canning/preserving, you should do some reading beyond this recipe or try it out with an experienced friend.  I took an in-person class from these guys and it really gave me the knowledge and confidence to do lots of canning without fear of poisoning anyone!  If you're not sure about how to can properly, this recipe will work just fine as a freezer jam.


Cranberry Port Jam (adapted from Serious Eats, original recipe here)
Makes 6 half-pint jars

12 ounce bag of fresh cranberries
1-1/2 cups ruby port
1/2 cup water
1 package liquid pectin (such as Certo)
1/2 tsp unsalted butter
1/2 cup dried cranberries, chopped
4-1/2 cups granulated sugar

1. Pulse the cranberries in the food processor until coarsely chopped.  Place in a very large pot -- you will need more space than you think, because there's a lot of sugar and the jam will bubble vigorously!  Add the port and water.  Bring to a boil, and then simmer until the cranberries have softened, stirring occasionally.  This should take about 10 minutes.
2. Add the pectin and butter, and return the mixture to a boil.  Once the mixture boils, add the dried cranberries and sugar all at once.  Return to a hard boil (i.e. one that cannot be stirred down), and boil for one minute.  Make sure to stir constantly during this part, as the jam can easily burn!  Remove the jam from the heat.
3. Ladle the jam into sterilized jars, leaving 1/4-inch headspace.  If you're using the standard half-pint size, you will need six.  At this point, you can let the jam cool and then refrigerate or freeze.  Or, you can preserve the jam in a boiling water bath for 10 minutes.  Let the jars sit out at room temperature overnight, and then check to make sure the lids have popped before storing at room temperature and/or gifting.

Friday, December 13, 2013

Spicy! Chicken-Green Chile Enchiladas with Homemade Enchilada Sauce + Giveaway Winners

These enchiladas are SPICY but delicious! I've never made my own enchilada sauce before, and it was way easier than I thought it would be.  It's not as authentic as one made with dried chilis, but it's a lot more delicious than the type out of a jar.  And, it made the perfect amount for a pan of enchiladas, at least to my taste (I like mine pretty saucy!).

The filling is a tasty combination of chicken, green chiles, tomatoes, and Monterey Jack cheese.  I usually put lots of cheese both in and on my enchiladas, but this cheese-lite version was really good!  Next time I'd probably do a less spicy filling to pair with the spicy sauce, although you can make both together if you're a fan of spicy food.  One tip on the chicken -- you can cook it any way you like (or get a rotisserie chicken), but everything will come together more quickly if you get it ready the night before - you can just roast it in the oven while you eat dinner and then it's all ready to tuck into the enchiladas the next day!

I'm also excited to announce the winners of my Bertolli Extra Light Tasting Olive Oil giveaway!  Everyone had really creative and delicious-sounding ideas for using this oil - just reading through the comments made me hungry!  The winners are Heather with her Guinness Bundt Cake (um, who could resist a recipe with that title?!) and Meghan with her homemade tater tots (I am a sucker for homemade tater tots...so amazing!).  Congrats to the winners - check your email for a message from me so that I can get your address to ship the olive oil.  (If I don't hear anything back by Monday, I'll have to choose another winner.)


Spicy! Chicken-Green Chile Enchiladas with Homemade Enchilada Sauce (adapted from Budget Bytes, original recipe here)
Serves 4

For the sauce:
2 T vegetable oil
2 T flour
2 T chili powder
2 cups chicken broth or water
3 ounces tomato paste
1/2 tsp cumin
1/2 garlic powder
1/4 tsp Aleppo pepper or cayenne pepper (to taste)
1/2 tsp salt

For the enchiladas:
2 chicken breasts, cooked and diced (about 2 cups)
10 ounce can diced tomatoes with chile (such as Rotel brand)
4 ounce can diced green chiles
1 cup freshly shredded Monterey Jack cheese (don't use the pre-shredded stuff!)
10 corn tortillas, heated until warm (a microwave is great for this)

1. Make the sauce. Combine the oil, flour, and chili powder in a medium pot.  Turn the heat to medium, and whisk the ingredients to combine.  When the mixture begins to bubble, let it bubble, whisking constantly, for one minute -- the mixture will be very thick.
2.  Whisk in the chicken broth a bit at a time, and then add the tomato paste, cumin, garlic powder, Aleppo or cayenne pepper, and salt.  Whisk until smooth, and bring to a simmer.  Once the mixture thickens slightly, taste and adjust for seasoning.  Set aside.
3. Preheat the oven to 350 degrees.  Spray a 9x13 baking dish with oil.
4. In a large bowl, combine the chicken, diced tomatoes, green chiles, and cheese.  Stir until well combined.
5. Fill each tortilla with about 1/3 cup of the chicken mixture, carefully roll up, and place in the baking dish.
6. Once the dish is full, pour the sauce over the top in an even layer.  Depending on how much sauce you like, you may not use it all (I like lots of sauce, so I did!).
7. Cover the dish with foil and bake 30 minutes.
8. Remove the dish from the oven and let sit about 10 minutes before serving.

Wednesday, December 11, 2013

Snickerdoodles

This past weekend, Tim and I were really feeling the Christmas spirit! On Saturday, we went into San Francisco to check out the holiday displays at the Hyatt, Union Square, and Macy's (adorable kittens!) -- gorgeous sunny weather but cold enough that it really felt like winter.  And, on Sunday we had a blast at church making Advent crafts in the morning and then baking Christmas cookies in the afternoon.  Tim baked one of his family's favorites, snowballs. I don't think I've ever had them before, and they were amazing - pecan studded shortbread cookies, wrapped around Hershey's kisses and dusted with powdered sugar!  I will definitely be taking this recipe back to bake with my family when I go to visit them.

I opted for snickerdoodles, because they're one of my favorites and I hadn't had any in a while.  Martha Stewart's recipe was super simple but really delicious - soft, slightly chewy cookies with lots of cinnamon-sugar flavor coating the outsides.  The main change I made to the recipe was to make the cookies smaller, since then you can eat more than one!  These still make medium-sized cookies - you could use rounded teaspoons if you prefer even smaller cookies.  Definitely try to use a high-quality cinnamon if you can -- I used Vietnamese cinnamon from Penzey's and I think it really added something special.  What holiday cookies are you baking this year?  Let me know in the comments!


Snickerdoodles (adapted from Martha Stewart's Cookies: The Very Best Treats to Bake and to Share)
Makes about 2-1/2 dozen

2-3/4 cups all-purpose flour
2 tsp baking powder
1/2 tsp coarse salt
1 cup (2 sticks) unsalted butter, room temperature
1-1/2 cups plus 3 T sugar
2 large eggs
1 T ground cinnamon (preferably Vietnamese cinnamon)

1. Sift together the flour, baking powder, and salt.  Set aside.
2. Beat together the butter and 1-1/2 cups of the sugar on medium-high speed until pale and fluffy, about 3 minutes.  Beat in the eggs one at a time.  Reduce speed to low and gradually mix in the flour mixture.
3. Scrape the dough into a clean bowl, and chill about 30 minutes (longer is fine).
4. Preheat the oven to 350 degrees and line baking sheets with parchment.
5. In a small dish, stir together the cinnamon and remaining 3 T sugar.  Scoop the dough by the heaping tablespoon, roll into balls, and then roll into the cinnamon-sugar, making sure each ball is generously coated.  Arrange on the baking sheets with plenty of space in between (I did 9 per insulated baking sheet).  Press down on each ball gently with the bottom of a measuring cup or glass, to a little thicker than 1/4-inch thick.
6. Bake 8-12 minutes, until the tops are dry -- keep a close eye after 8 minutes or so as the cookies will go from wet on top to burned on the bottom pretty quickly.  Let cool on wire racks.


I'm sending these cookies to the Secret Recipe Club Holiday Party Link-Up! 

Sunday, December 8, 2013

Secret Recipe Club: Butternut Squash Soup with Pepitas

First off: don't forget to enter my giveaway for Bertolli Extra Light Tasting Olive Oil - it's open until Wednesday night!  Now, on to the main event:

My partner for this month's Secret Recipe Club was Katrina, the writer of Baking and Boys.  When I first looked at her blog, I was sure I was going to make one of her fabulous cookie recipes -- they all look really delicious!  I was super tempted by Katrina's Lofthouse sugar cookies, surprise mint cookies, and chippy peanut butter cookies.  Yum!  However, after all the amazing food of Thanksgiving, I needed to detox a little bit and instead decided to make an amazing butternut squash soup.  I was so glad I changed course, because this is one of the creamiest squash soups I have ever eaten! The texture was so velvety - I couldn't believe there was no cream, dairy, or cheese.  And, although I used chicken stock, it would be very easy to make this recipe vegan with vegetable stock.

I made a few substitutions -- fennel for celery (I admit, I'm a celery-hater, though I know some of my readers are fennel-haters, so you can always sub the celery back in!), onion for shallot, and a sprig of rosemary simply because we had some leftover that I didn't want to go to waste.  Upon typing up the recipe this morning, I also realized I completely left out the maple syrup!  The soup was really delicious without it, but you can add a couple of tablespoons if you prefer a sweeter soup.

My favorite things about this soup were the details -- first and foremost the lemon zest.  It sounds like a small element, but it added a terrific flavor to the soup and I was totally in love.  The pepitas on top also added great crunch, and kept the pureed soup from feeling like baby food, which I think can sometimes be a problem with this type of soup.  The color was also fantastic - using two large carrots made the soup a bright, vibrant orange, which you sometimes don't get with squash soups.  Definitely a winner - thank you Katrina!


On the side: roasted brussels sprouts and bacon, homemade bread, and carrot-fennel salad (subbing mint for the herbs and adding golden raisins and almonds).

Butternut Squash Soup with Pepitas (adapted from Rachel Ray, via Baking and Boys)
Serves 4

1 small-to-medium butternut squash
Oil spray
Olive oil
2 large carrots, peeled and chopped
1 bulb fennel, cored and chopped
1/2 medium yellow onion, peeled and chopped
Salt and pepper
2 garlic cloves, minced
1 quart (4 cups) chicken stock
1 sprig rosemary
Zest of 1 lemon
Roasted, salted pepitas (hulled sunflower seeds), for garnish

1. Preheat the oven to 400 degrees. Cut the squash into quarters, and scoop out the seeds -- no need to peel.  Spray a foil-lined baking sheet with oil, and place the squash on the baking sheet cut-side-down.  Roast until very soft -- mine took about 30 minutes, but timing will vary based on size and the particular squash.  Remove from oven, and let cool until easy to handle without burning yourself.
2. Heat a couple tablespoons of olive oil in a large pot over medium heat.  Add the carrots, fennel, and onion and season generously with salt and pepper.  Cook, stirring often, until the vegetables are softened, 7-8 minutes.  Add the garlic and cook for another minute or so.
3. Pour in the chicken stock and add the rosemary sprig.  Bring to a simmer.
4. Scoop the squash out of its skin, and add to the pot with the simmering vegetables.  If you have time, simmer for 10 minutes or so all the flavors get nicely combined.
5. Remove the now-wilted rosemary sprig and add the lemon zest.  Puree with an immersion blender (easiest) or in batches in a regular blender or food processor (be careful not to burn yourself!).
6. Serve topped with a generous sprinkle of pepitas.  Leftovers reheat well -- just store the pepitas separately.

Wednesday, December 4, 2013

Cranberry-Chocolate Chip Muffins with Olive Oil + GIVEAWAY!

I like using olive oil in baked goods (and cooking in general), because it seems like a healthier option than other fats.  But, depending on what you're making, the flavor can be too strong -- that might be fine for some recipes (like a savory muffin), but often isn't what I'm looking for in baking.  Enter light tasting olive oil, which has the same health benefits of olive oil without the olive flavor.  Bertolli sent me a bottle to test out in my holiday baking, and is offering up two more as a gift to readers!  Read on to find out how my recipe turned out and how to enter the giveaway...

I decided to test out my new olive oil with cranberry-chocolate chip muffins.  I had some cranberries from our CSA, and cranberries always put me in a holiday mood, so I thought they'd be the perfect thing to bake with....plus, you can pretty much never go wrong with chocolate!  Following the instructions that came with my new bottle of oil, I subbed in olive oil for the butter, using 3/4 as much.  Despite using oil instead of butter, the muffins tasted really rich and delicious.  And, I couldn't taste any olive flavor at all.  Instead, these muffins were all tart cranberry, sweet chocolate, and a little tangerine zest just for fun.  However, we may have negated any health benefits by eating the entire batch between two of us over the course of a couple of days...whoops!  I definitely call this recipe a win -- these muffins would be great for Christmas morning or any special holiday breakfast or brunch.  They just look so festive with the bright red berries on top!


Now, on to the best part: a giveaway! Bertolli has generously offered up two bottles of its new extra light tasting olive oil so that you can try it out in your holiday baking this year.  Just comment below with your idea for how you would use this oil in holiday baking - it could be a favorite recipe you'd like to test out with light olive oil, or something entirely new that you just think sounds delicious.  I'll pick my two favorite ideas, and each winner will receive a free bottle to try it out!  US addresses only, please, and make sure you leave a way to contact you (email address, website, twitter handle, etc.).  The giveaway will be open until December 11.

Cranberry-Chocolate Chip Muffins with Olive Oil (adapted from Dessert for Two, original recipe here)
Makes 8-12 muffins (depending on size)

6 T 'light' olive oil (such as Bertolli extra light tasting olive oil)
2/3 cup sugar
2 large eggs
1/2 tsp freshly grated tangerine or orange zest
2/3 cup + 1/2 cup flour
1 heaping tsp baking powder
Pinch of salt
1/2 cup buttermilk
1 cup fresh cranberries
1/2 cup chocolate chips

1. Preheat the oven to 400 degrees and spray a muffin tin with oil.
2. In a mixing bowl, whisk together the oil and sugar vigorously.  Whisk in the eggs and orange zest until well incorporated.
3. Sift the flour, baking powder, and salt over the wet ingredients.  Whisk a few times, and then add the buttermilk and whisk until just combined.  Gently fold in the cranberries and chocolate chips.
4. Divide the batter among the muffin tins - 8 for larger muffins or 12 for smaller muffins.  Bake 15-20 minutes, keeping a close eye on the muffins.  When the tops are golden brown and spring back to the touch, the muffins are ready.

Full disclosure: I received a complimentary  bottle of olive oil for review purposes.  All opinions and recipe testing are my own.

Monday, December 2, 2013

Pumpkin Cheesecake Tart with Bourbon Caramel

This holiday dessert has got to be my new favorite version of pumpkin pie.  I made it for a big Thanksgiving celebration that Tim and I went to with friends of ours, and it was a big hit.  Since we were going to a big gathering (20+ people), I doubled the recipe and made two tarts - it really isn't any harder than making one, so I recommend this if you're serving a big group.  And, you'll want extra because this tart is insanely good! The pumpkin layer is like a cheesecake, full of delicious pumpkin spices and a little cream cheese tang.  On top goes a slightly salty bourbon caramel that I might have eaten by the spoonful if I hadn't needed it for the tart!  The bourbon flavor is pretty subtle despite the fact that you add a lot -- it just adds that little extra kick to the otherwise rich and buttery caramel.  I may make this component again just to serve over ice cream - it was so good!  My family has a tradition of serving cheesecake on New Year's Eve, so this recipe is definitely coming back for an encore in about a month...


Pumpkin Cheesecake Tart with Bourbon Caramel (adapted from Fine Cooking, original recipe here)
Makes 2 tarts (easily halved)

1 package refridgerated pie crust dough (2 rounds of dough) - or make your own

For the caramel
1 cup packed brown sugar
4 T unsalted butter, cut into small pieces
1 tsp kosher salt
2 cups heavy cream
1/2 cup bourbon

For the filling
8 ounce package cream cheese, at room temperature
2/3 cup packed brown sugar
2 large eggs
2 large egg yolks
15 ounce can pumpkin puree
2 tsp cinnamon
1-1/2 tsp ground ginger
1/2 tsp freshly grated nutmeg
Pinch of salt
1 cup half-and-half

1. Fit the pie dough into two pans -- pie plates work well, or you can use a 9-inch springform pan for straight sides.  I used one of each.  Pre-bake the crusts according to the directions on your package of pie dough.  Of course, you can use any pie crust recipe you prefer -- just follow the directions to blind bake two crusts.  Leave the oven on, reducing heat to 350 degrees.  Cool the crusts on a wire rack.
2. Make the caramel while the crusts bake.  Heat a large non-stick skillet over medium heat.  Add the brown sugar, butter, and salt.  Stir until the sugar is completely melted and starts to darken, 6-7 minutes.  Whisk in the cream with a silicone whisk a bit at a time and bring to a simmer.  Whisk until the caramel is very thick, 10-12 minutes.  Whisk in the bourbon, and simmer 1-2 minutes.
3. Brush a thin layer of caramel over the bottom of each crust, and then pop the crusts in the fridge to help the caramel set.  Set the remaining caramel aside (off the heat) while you prepare the filling.
4. Make the filling.  Beat together the cream cheese and brown sugar on medium speed until light and fluffy, about a minute.  Add the eggs and egg yolks, beating until well combined.  Add the pumpkin, spices, and salt, and beat until everything is well combined.  Reduce the mixer speed to low and mix in the half-and-half.
5. Divide the filling between the two pie crusts.  Bake until the filling has puffed and the surface no longer appears wet, 35-40 minutes.  Cool on a wire rack until the filling is completely cooled, about one hour.
6. Reheat the caramel over low heat until it is pourable.  Divide between the two pies, tilting to spread it in an even layer.
7. Cover with plastic wrap and chill at least 4 hours, until the caramel is firm.


Remains of the pie...

Saturday, November 23, 2013

Cookbook Review: The New Artisan Bread in Five Minutes a Day

I love the concept of "Bread in 5" -- you mix up a big batch of dough, stash it in the fridge, and then bake off portions over the next couple of weeks whenever you like.  It's not quite five minutes a day, but it certainly makes it possible to have fresh bread or pizza for dinner without coming home early from work (or buying the dough at the store, which is my usual lazy technique!).  I got a copy of the "healthy" version a few years ago from the library, but was never totally satisfied with the flavor and texture of the breads I made - I'm not sure if this was user error, but in any case I mentally put this in the category of "nice idea, but..."

Still, when I got an email asking if I wanted to review the The New Artisan Bread in Five Minutes a Day, the updated version of the original (i.e. non healthy) cookbook, I figured I would give this concept another try.  I've got to say, I'm now a convert - I'm not sure if it's just that the technique works better with 100% white flour, or whether I messed something up when I originally tried the whole wheat recipes, but either way the breads I made from this cookbook were fantastic!  My favorite part was just how many different things you could make with the master recipe -- which is just flour, yeast, salt, and water.  Over the course of about a week-and-a-half, I made ciabatta, three pizzas (one full-sized, and two mini lunch-sized), and naan, and they were all delicious.

Ciabatta with jam

Fair warning -- you're not going to get a perfectly authentic product.  Naan typically has yogurt or milk mixed into the dough, and my ciabatta definitely didn't have the big holes you see in the real thing, despite an extended rising time.  Still, there is zero chance that I would have mixed up three different batches of 'authentic' dough over the course of eight or nine days, and the results were super yummy.  I loved being able to bake fresh bread to go along with dinner, without feeling like I was spending the time to make an extra recipe in addition to my main dish.  Plus, the initial big batch of dough is super simple to put together - you don't have to pull out the stand mixer, and the rising time is very flexible.

Pizza topped with leftovers: BBQ sauce, roasted potatoes, bell pepper, sun-dried tomato chicken, herb goat cheese, pesto Jack, and scallions.

You can find the master recipe for this technique -- which is what I used to make all my breads this past week -- on the Bread in 5 website.  The cookbook provides some additional dough recipes (including whole grain, gluten free, and sweet doughs), as well as tons of different ways to shape and cook the bread.  I'm excited to try pita bread, crescent rolls, and pretzels next!

Naan

This book is perfect for: people who love fresh-baked bread but are short on time, people with a lot of fridge space (the bowl of dough takes up a fair amount of real estate), gluten-free bakers (there's a whole new chapter on gluten-free bread), and folks looking to save some money (the recipe is way cheaper than purchasing the same number of loaves/dough at the grocery or bakery).
Skip this one if: you'd rather spend more time to get the most authentic bread possible, you're on a diet (seriously - this stuff was delicious, but I ate a LOT of bread!).

Full disclosure: I received a complimentary copy of this cookbook for review purposes.  All opinions and recipe-testing are my own.

Wednesday, November 20, 2013

Pumpkin Curry

We recently got sugar pie pumpkins in our CSA box, and I decided to go in both sweet and savory directions with them.  One pumpkin got made into ginger-pumpkin pie (yum!), and the rest went into this pumpkin curry.  Pumpkin curry is one of Tim's (and my!) favorite dishes to order at Thai restaurants, so it was fun try try and recreate it at home.  I didn't think the curry tasted quite like the restaurant version, but it was still really tasty.  Next time, I might steam the pumpkin and cut it into bigger chunks, which I think would feel more authentic.  In any case, this is an easy dish once you get the pumpkin peeled and cut up.  Have everything ready, because once you start the cooking process, it goes very quickly.


Pumpkin Curry (adapted from eat, live, run, original recipe here)
Serves 4

1-2 smallish sugar pie pumpkins
Vegetable oil
1 T coconut oil
3 T Thai red curry paste
1 15-ounce can coconut milk
1/4 cup water
1 T fish sauce
2 tsp brown sugar
2 kaffir lime leaves, torn into a few pieces
6 basil leaves, chopped
2 red Thai chilies, pierced several times with a knife
A large handful of green beans, trimmed and cut in half
1 bell pepper, diced
12 ounces thinly cut pork loin cutlets, cut into bite-sized pieces
Cooked rice, to serve

1. Preheat the oven to 400 degrees and line a baking sheet with foil.
2. Cut the pumpkin(s) in half, peel, and cut into cubes.  Toss with a little vegetable oil, and then spread in a single layer on the baking sheet.  Roast about 30 minutes, until tender.
3. In a large skillet, heat the coconut oil over medium-high heat until melted.  Add the curry paste and whisk into the hot oil.  Let it sizzle about 30 seconds.  Then whisk in the coconut milk, until smooth.
4. Add the water, fish sauce, brown sugar, kaffir lime leaves, basil leaves, and chilies.  Bring to a simmer.
5. Add the bell peppers and green beans, and keep the liquid at a simmer.  After about 5 minutes, add the pork.  Simmer for 5-10 minutes more, until the vegetables are just tender.
6. Add the roasted pumpkin to the curry, and simmer for another couple of minutes until the pumpkin is heated through.
7. Serve with rice.

Tuesday, November 19, 2013

Baked "Risotto" with Roasted Cauliflower

This baked rice dish is total comfort food.  Although it's called a 'risotto,' and although it uses Arborio rice, don't make it expecting the real deal - because the rice isn't stirred constantly while cooking, it doesn't have that risotto texture.  Tim and I both thought it was more similar to 'cheesy rice' that we both remembered from our childhood. Of course, this version is a bit fancier with Gruyere cheese, roasted cauliflower, wine, and panko.   And, because the rice is baked, this dish is a lot easier and more hands-off than a traditional risotto.

You'll need to plan a fair amount of time to make this dish, as it involves roasting the cauliflower, sauteing the onions and rice, and then baking everything together.  That said, each step is easy and can be done mostly unattended.  And, the results are fantastic -- creamy, cheese rice with tender, roasty cauliflower and crispy breadcrumbs!  It's the perfect way to warm up on a chilly evening.

On the side: We served sauteed spinach with red pepper flakes for a little spice, but any type of green vegetable or salad would be great.  Just don't go too rich so that you balance out the rice.


Baked "Risotto" with Roasted Cauliflower (adapted from Home Made Winter)
Serves 4

1 small head cauliflower, cut into florets
Oil
Salt and pepper
1 medium onion, diced
1 clove garlic, minced
7 ounces Arborio rice
1/2 cup dry blush or white wine
2-1/4 cups chicken broth
7 ounces Gruyere cheese, grated
1/2 cup panko

1. Preheat the oven to 375 degrees.  Toss the cauliflower florets with  oil, salt, and pepper.  Spread in an even layer on a foil-lined baking sheet, and roast until browned and tender, 10-15 minutes.  Lower the oven temperature to 350 degrees.
2. In an oven-safe skillet, heat a swirl of oil over medium heat.  Add the onion and saute until softened and just starting to brown, about 10 minutes.  Add the garlic and cook for another minute.  Add the rice and turn the heat up to medium-high.  Saute for another few minutes, until the rice starts to become slightly toasted.
3. Pour in the wine and broth, and bring to a boil.  Stir in the cauliflower and cheese, and put a lid on the skillet.
4. Pop the skillet into the 350 degree oven, and bake 20 minutes.  Remove from the oven, and sprinkle the panko over the rice.  Return the skillet to the oven, uncovered, and bake for 5 minutes, until the rice is tender and the panko is slightly browned.  Serve hot!

Monday, November 11, 2013

Pear-Delicata Squash Soup with Ginger and Goat Cheese

This soup screams 'autumn' to me -- it's full of warm fall flavors and will make your kitchen smell amazing.  This is one of those recipes with few ingredients but a big impact.  Probably the first thing you taste is the ginger -- there's a lot of it in here, and it provides an awesome spicy kick.  The squash and pears add sweetness, while a sprinkle of goat cheese on top contributes a creamy tang -- whole-milk yogurt would also work well in this role.  This soup is the perfect way to warm up on a chilly autumn evening - serve with crusty bread and a salad for a complete meal.


Pear-Delicata Squash Soup with Ginger and Goat Cheese (adapted from Dinner with Julie, original recipe here)
Serves 4

1 large delicata squash
3 small pears
Oil
1 T butter
1 small onion, minced
1-inch knob of ginger, peeled and chopped
3-4 cups chicken stock
Salt
Crumbled goat cheese, to serve

1. Preheat the oven to 425 degrees and line a baking sheet with foil.
2. Cut the squash in half and scoop out the seeds.  Quarter the pears and cut out the cores.  There's no need to peel either one.  Coat the baking sheet with a light layer of oil to prevent sticking, and then place the squash and pears cut-side-down on the foil.  Roast about 15 minutes, and then test to make sure everything is tender.  Let cool for a few minutes, and then peel off the skins - they should slip off the pears easily, and the squash flesh should scrape off the skins with a spoon.
3. Meanwhile, make the soup base.  Heat a soup pot over medium heat.  Add a drizzle of oil along with the butter, and let the butter melt.  Cook the onion for 7-8 minutes, until soft, stirring often.  Add the ginger and cook for another minute.
4. When the squash and pears are ready, add them to the soup pot with the aromatics.  Add 3 cups stock.  Bring to a boil, and then puree with an immersion blender (or, let cool slightly and puree in a blender in batches).  Add more stock if you prefer your soup to be thinner.
5.  Add salt to taste, and then serve hot with goat cheese crumbled on top.

Thursday, November 7, 2013

Carrot-Beet Slaw with Golden Raisins

I like lettuce-based salads as much as the next person, but I get bored with them pretty fast.  Plus, they don't keep - you either eat it the night it's made, or it pretty much has to go in the trash.  That's why I'm a huge fan of salads made with sturdier veggies -- kale, carrots, fennel, raddichio, and others.  Although they sometimes require a bit more up-front work in terms of slicing, shredding, and peeling, a big batch will have me covered for dinner plus a few lunches.  This particular slaw is full of beets and carrots, and I was a huge fan -- even my beet-skeptical boyfriend liked it!  I love the way the shredded beets dye everything a hot pink color; the juicy, plump golden raisins, and the sharp bite from a bit of minced fresh garlic.  Since I was already peeling and shredding the beets, I used pre-shredded carrots from the grocery, but I think this would be even better with freshly grated carrots if you have the time.  Overall, this slaw is colorful, fun, and flavorful - a real winner!


Carrot-Beet Slaw with Golden Raisins (adapted from Bon Appetit)
Serves 4-6

3/4 cup golden raisins
1/4 cup cider vinegar
1 garlic clove, minced
1 pound beets (about 3 small), peeled and grated
10 ounce bag shredded carrots (or 1 pound carrots, peeled and grated)
1/2 cup minced fresh parsley
1/4 minced fresh mint
1/2 tsp crushed red pepper flakes
Salt and pepper
1/3 cup olive oil

1. Combine the raisins, vinegar, and garlic in a bowl, and stir to combine.  Let sit for 30-60 minutes.
2. Combine the beets, carrots, parsley, mint, and crushed red pepper flakes in a serving bowl.  Add the raisin-vinegar mixture.  Toss to combine.  Season with salt and pepper, and toss again.
3. Add about two-thirds of the olive oil and toss to combine.  Taste, and add more salt, pepper, and/or oil as needed.

Sunday, November 3, 2013

Secret Recipe Club: Chicken 'Fajitas' in the Slow Cooker

My partner for this month's Secret Recipe Club was Anna of bcmom's kitchen.  When I saw her recipe for chicken fajitas in the slow cooker, I knew I wanted to make it - I love using my slow cooker, and I hadn't made Mexican food in a while. As Anna points out in her post, these aren't really fajitas -- fajitas would be cooked quickly over hot heat, while this dish cooks low and slow in the Crockpot.  That said, this dish does have all the components of fajitas - chicken, peppers, and onions - and it tastes awesome all wrapped up in a tortilla!  It will look like you have way too many veggies and too little chicken, but don't worry - the veggies really melt down over the long cooking time, and I thought the balance at the end was perfect.  I do think you could get away with a shorter cooking time (maybe 4-6 hours on low), but 8 hours works as well -- I was worried the chicken was burned when I peeked in the Crockpot, but it was just fine.  This dish isn't very spicy, so if you like your Mexican food on the spicier side, be sure to add something spicy on top (we used pepper jack cheese) or add some chilies when you start the dish.  Yum!


Chicken 'Fajitas' in the Slow Cooker (adapted from Stacy Makes Cents, via bcmom's kitchen)
Serves at least 4

1 yellow onion, thickly sliced
3 bell peppers, thickly sliced
1 pound boneless chicken thighs
2 T cumin
1-1/2 T chili powder
1/2 tsp garlic powder
1/2 tsp salt
1/2 cup chicken broth
Juice of 1 lime

1. Layer the ingredients in your crockpot.  Start with the peppers and onions, and then lay the chicken thighs on top in a single layer.  Sprinkle the cumin, chili powder, garlic powder, and salt over the chicken.  Finally, drizzle the chicken broth and lime juice over everything as evenly as possible.
2. Cook on low for 8 hours.
3. Shred or chop the chicken into bite-sized pieces.  Stir back into the crockpot.
4. Serve with tortillas and fixings (we used sour cream and pepper jack cheese).

Friday, November 1, 2013

Pesto Chicken Quesadilla with Seasonal Produce

This is one of those "let's see what's in the fridge" lunches that made me incredibly happy to have a well-stocked fridge full of yummy leftovers.  I combined a bit of leftover pesto chicken from Trader Joe's with some roasted pumpkin and fresh basil leftover from making pumpkin curry, a pear from our CSA box, and pesto cheese that we picked up at the farmer's market last weekend.  These made a divine (if totally non-Mexican) filling for quesadillas.  You could replicate similar flavors by combining regular leftover chicken and cheese with a generous layer of pesto.  And, don't be afraid to switch up the produce for whatever you have around -- braised fennel and thinly sliced apples would also be awesome, as would a match-up of thinly sliced figs and spinach.  Get creative - your fridge is your oyster!


Pesto Chicken Quesadilla with Seasonal Produce
Serves 1

1 small piece of pesto chicken, cooked and thinly sliced
A scoop of leftover roasted pumpkin
2 medium-sized flour tortillas
1 ripe pear, peeled, cored, and thinly sliced
5-6 leaves of fresh basil
A generous sprinkle of grated Pesto Jack cheese (such as Spring Hill)

Heat up the chicken and pumpkin until warmed through.  Warm the tortillas on both sides.  Then, layer your quesadillas in a hot, non-stick skillet.  Start with a tortilla, and then add the chicken, pumpkin, pear slices, basil, and cheese.  Finish with another tortilla.  Cook for a couple of minutes on each side, until the tortillas are crispy and the cheese is melted.  Slice into quarters and eat right away!

Friday, October 25, 2013

Apple Cinnamon Roll Muffins

I made these on a Saturday morning a few weeks ago when Tim was feeling under the weather.  I figured homemade cinnamon rolls would cheer anyone up, and I was right!  These rolls have a long rising time, so if you start them in the morning they will definitely be more of a brunch (or even lunch) treat, but don't let that stop you -- they're so good that they are worth the wait.  (Note: if you want yeasty sweet rolls that you can make for breakfast without getting up at the crack of dawn, try my Nutella Swirl Buns!)  Although I haven't tried it, I bet you could also prepare them the night before up through making the rolls and placing them in the pan, and then stash them in the fridge and finish the second rise the next morning -- I've tried this with my sweet potato cinnamon rolls with great success.

As for the finished rolls - they're divine!  The dough is super tender and the grated apple in the filling adds a fantastic 'apple pie' flavor to the rolls.  I also love the glaze, made with apple juice squeezed from the grated apples -- it amps up the apple flavor in the rolls even more.  These rolls are definitely best right out of the oven, but they keep pretty well for a few days if you have a.


Apple Cinnamon Roll Muffins (adapted from Cooking Classy, original recipe here)
Makes 12

1/2 cup milk, warm
1-3/4 tsp active dry yeast
1/2 cup sour cream
1/3 cup sugar
2 T oil
2 T melted butter
1 large egg
1 tsp vanilla
1/2 tsp salt
3 to 3-1/4 cups all purpose flour

For the filling:
2 cups lightly packed peeled and grated apples (about 3 medium)
3/4 cup packed brown sugar
1 T cinnamon
1/4 tsp freshly grated nutmeg
1/4 cup butter, halfway melted

For the topping:
2 cups powdered sugar
1/2 tsp vanilla
Reserved juice from the grated apples

1. Add the yeast to the warm milk and whisk to dissolve.  Let rest 5-10 minutes, until the yeast proofs.
2. Meanwhile, whisk together the sour cream, sugar, oil, butter, egg, vanilla, and salt in the bowl of a stand mixer. When the yeast is ready, add it to the bowl.  Whisk to combine.  Then add 1-1/2 cups flour and beat until combined.  Switch to the dough hook, and add an additional 1-1/2 cups flour, a bit at a time.  Knead until a smooth, elastic dough forms, adding more flour as needed to create a soft dough -- about 5 minutes of kneading time.
3. Transfer the dough to an oiled bowl, cover, and let rise about 1-1/2 hours, until doubled.
4. While the dough is rising, make the filling.  Place the grated apple in a fine mesh strainer or a piece of cheesecloth.  Let sit for a few minutes, and then squeeze out the excess liquid into a clean bowl.  Save this apple juice for the topping.
5. In a separate small bowl, whisk together the brown sugar, cinnamon, and nutmeg.  Set aside.
6. Punch down the dough.  Spray your working surface and rolling pin with a light coating of oil, and then roll out the dough into an approximately 19x13 rectangle.  Brush the top with the butter, and sprinkle the sugar-spice mixture over the top.  Squeeze the grated apple again to remove any excess liquid (again, reserving the apple juice for the topping), and then sprinkle the apples over the dough in an even layer.
7.  Beginning on the long side, roll up the dough as tightly as possible.  Spray a muffin tin with oil.  Cut the dough into 12 rolls, and transfer each roll to the muffin tin.  Cover with plastic wrap, and let rise 40 minutes.
8. In the last 10 minutes of rising, preheat the oven to 375 degrees.
9. Bake the rolls for 14-17 minutes, until they are golden and the centers are cooked through.  Let cool for just a minute or two, and then remove from the pan to prevent sticking.
10. Make the glaze.  Whisk together the powdered sugar, vanilla, and about 3 T of the reserved apple juice.  Add more apple juice as needed to make a drizzling consistency.  Then drizzle the glaze over the warm rolls and eat while still warm.

Sunday, October 20, 2013

Green Team Sustainable Feast


Check out this awesome plate from the sustainable potluck we had at my church today - everyone brought dishes made from ingredients grown or made within 100 miles!

Friday, October 18, 2013

Instagramming My Dinner: Pork Pot Roast with Pears, Apples, and Honey

I have to admit I've gotten a little lazy with photos lately -- it's always hard to take good photos in fall and winter once the evening light fades and I'm always cooking dinner after dark, and lately I've been resorting to the iPhone + Instagram.  So, here is one of those Instagram dinners -- nothing fancy, but delicious none the less!  And, the flavors had me happy that fall weather is here, even if I miss the evening sunlight.

This is a Nigel Slater recipe, and I'm a huge fan of his -- something about his recipes always just makes me happy!  The star of the show here is definitely the pork roast, and the recipe doesn't specify what type.  I told my butcher what I was making, and he recommended a rib cut pork chop roast -- basically it was five pork chops that hadn't been cut apart yet.  This cut turned out yummy, but not as tender as I might have liked, and it definitely took longer than the recommended cooking time.  But - the flavor was definitely there, so I'd absolutely give this another try and maybe ask my butcher about a different cut of bone-in pork roast next time.  Anyone have a recommendation?

As for that flavor, it comes from getting the meat nice and browned before you stew it, and then adding in onions, apples, pears, honey, and pear cider.  This makes for pretty much the perfect autumn meal - it's got that great 'stick-to-your-ribs' quality that you might be craving as the weather gets a little chilly.  I loved how the fruit softened up -- almost like apple or pear sauce but with the pieces still held together and a more savory element.  Add mashed potatoes on the side to complete this dish, and I promise you will not miss summer one bit!


Pork Pot Roast with Pears, Apples, and Honey (adapted from Ripe by Nigel Slater)
Serves 5-6

Oil
3-1/2 pounds pork roast on the bone (I used a rib cut pork chop roast, as recommended by my butcher)
Salt and pepper
1 large yellow onion, thickly sliced
4 smallish pears
2 smallish apples
2 cups pear cider
1/4 cup honey

1. Preheat the oven to 400 degrees.
2. Set a big, oven proof pot or Dutch oven on the stove.  Add a good glug of oil and turn the flame to medium-high heat.
3. Season the roast with salt and pepper.  When the oil is hot, add it to the pot and brown on all sides.  Save a short side for last so that the roast is turned up on one end and there's some room in the bottom of the pan.
4. Add the onions to the empty space in the pan, and turn the heat down to medium.  Cook, stirring occasionally, until softened.
5. While the onions are softening, quarter the pears and apples and cut out the cores.  No need to peel - the peels will help the fruit stay together as it cooks.
6. Push the onions to the edges of the pan and turn the pork so a larger part of it makes contact with the bottom of the pan.  Scatter the apples and pears around the pork roast.  Pour the cider over, and then drizzle the honey over the pork and fruit.
7. Once the cider comes to a boil, remove the pot from the heat.  Cover tightly, and bake in the oven for about an hour and fifteen minutes.  [After an hour or so, check the meat - I ended up cutting my chops apart to finish the cooking in the final fifteen minutes, but your mileage may vary depending on the specific cut of meat you end up with.]
8. Thinly slice the pork and serve with the fruit, onions, and pan sauce.

Want to follow me on Instagram? Do it right here!

Monday, October 14, 2013

Pizza Bianca e Verde

I recently got an email asking if I'd like to review The Complete Leafy Greens Cookbook.  You guys can probably guess from my posts on this blog that I'm a big fan of greens -- they show up a lot in my cooking.  So, I was excited to see what this new cookbook was all about!  I think it must cover every leafy green known to man.  There are your typical greens like spinach and chard, as well as unusual greens like taro leaves and purslane that you're only likely to find at special groceries or farmer's markets -- in these cases, the author also provides substitution information so you can still try out the recipes even if you don't have access to a particular ingredient.

What I liked about the book: there were photos of each type of green, as well as lots of information about each one.  It was a lot of fun to browse through and learn about some ingredients I've never tried.  I think this book will make me more adventurous about trying out a new type of green if I come across it!  The info on storage, measuring equivalents, etc. was also useful -- although one can look up this type of thing online, it's nice to have it all in one place for easy access.  I also loved the recipe I tried - see below!  In general, I was happy to see that the recipes included both side dishes and entrees, so you get a good amount of variety.  Everything is vegetarian or vegan, which may or may not float your boat.

What I wasn't so crazy about: there aren't photos of the finished dishes, which I like to see.  I also thought the vegetarian/vegan warnings were overdone -- this information could have been contained in a section at the beginning rather than having to list that Parmesan isn't technically vegetarian due to the rennet in every single recipe where the ingredient appears (and really - I have never met a vegetarian who cares about this, although I am sure they are out there!).  I would have rather seen info unique to each recipe rather than the same information being repeated over and over again.  But, that's a pretty minor quibble.

I decided to test out the Pizza Bianca and Verde, a four-cheese pizza topped with wilted baby greens.  I am in love with this pizza, and I've already made it twice!  It starts off with a divine garlic-herb olive oil that's brushed all over the crust.  (Seriously - I would eat this crust with just the olive oil!)  Then, pile on a ricotta-mozzarella-Asiago mixture and bake until the cheese is melted and bubbly.  Finally, add a bunch of baby arugula and spinach and a sprinkle of Pecorino Romano, and pop everything back in the oven just until the greens are wilted.  Don't be afraid to use lots of greens - they will wilt down dramatically, so you can use way more than it looks like you need.

Don't stress about the proportions of cheese and greens - I measured everything out very carefully the first time I made this pizza, and the second time I just used what I had left over.  Both pizzas were terrific!  You can also add other veggies as you like - I made it with red pepper added under the greens for my second attempt, and that was delicious as well.


Pizza Bianca e Verde (adapted from The Complete Leafy Greens Cookbook: 67 Leafy Greens and 250 Recipes)
Makes 1 pizza, serving 2-3

1 T olive oil
2 large cloves garlic, minced
1/2 tsp dried oregano or Italian spice blend
3/4 tsp kosher salt
Several grinds of black pepper
4 ounces fresh mozzarella, cut into small cubes
2 ounces grated Asiago cheese (about 3/4 cup)
1/2 cup whole milk ricotta cheese
1 pound pizza dough, at room temperature
2 ounces baby arugula or baby arugula-baby spinach mix (a few big handfuls)
Freshly grated Parmesan or Pecorino Romano cheese, to finish

1. Preheat the oven to 500 degrees (or as hot as it will go).  Get your preferred pizza pan/pizza baking set-up ready.  I just use aluminium foil on a big sheet pan, but many people get fancier - this pizza will be delicious either way!
2. In a small bowl, stir together the oil, garlic, oregano, salt, and pepper.
3. In a medium bowl, combine the mozzarella, Asiago, and ricotta.  Stir to combine.
4. Stretch out your pizza dough to the desired thickness/shape and place on your pizza pan.  With my pan, I like to pre-bake the crust for about 3-5 minutes before putting on toppings, but your mileage may vary depending on your baking method.  If you're using a regular pan with foil or parchment, I'd go for the pre-bake as it will ensure a crispy crust.
5. Brush the garlic olive oil all over the crust, going right up to the edges.  Then add the cheese mixture in an even layer, using your fingers to break up any large clumps.  Leave a bit of a border, as the cheese will get melty and run off the edges otherwise!
6. Bake the pizza until the bottom is golden brown and the cheese is bubbly - time will very depending on your oven, so keep an eye on the pizza (probably 10-15 minutes).
7. Remove the pizza from the oven, but leave the heat on.  Scatter the arugula all over the pizza, using more than it looks like you need because it will wilt down dramatically.  Grate the Parmesan all over the top of the greens.
8. Return the pizza to the oven for 30-60 seconds, just until the greens are wilted.
9. Let the pizza sit at room temperature for a few minutes before slicing and serving.
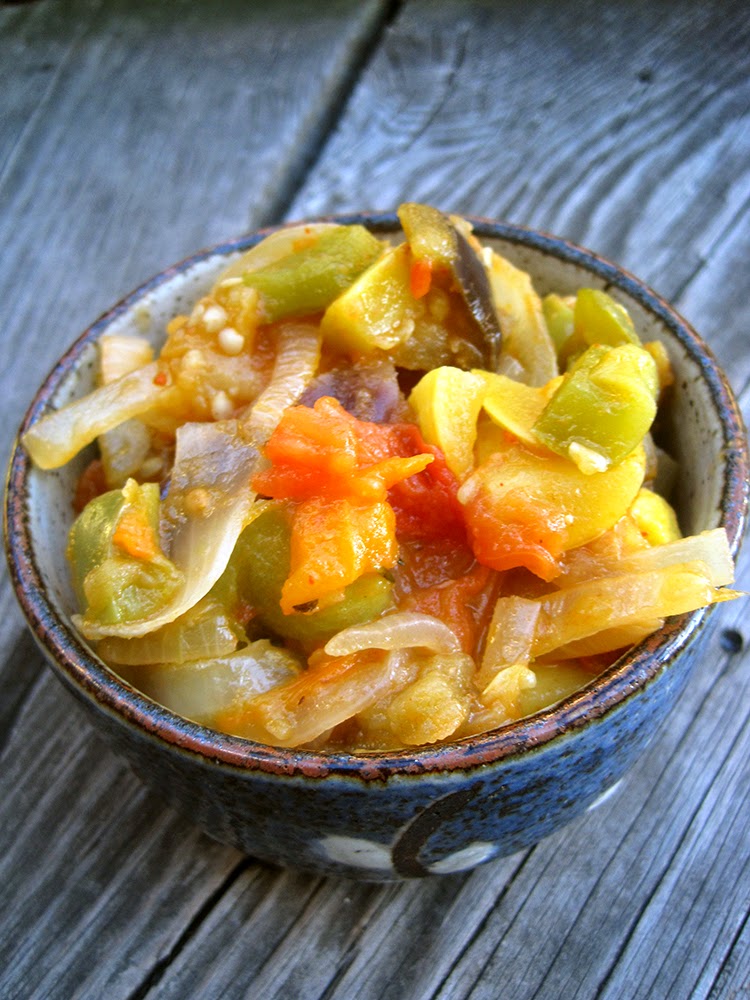

Full disclosure: I was provided with a complimentary review copy of this cookbook.  All opinions and recipe-testing are my own.

Wednesday, October 9, 2013

Pork Stew with Hominy and Collard Greens + Giveaway Winner

When I came across Adam's post on Amateur Gourmet about pork stew with hominy, I had to laugh.  Just like him, I had a bag of Rancho Gordo dried hominy in my cupboard that had been hanging out for a year or so, waiting for me to get my act together and cook something with it!  Although I'd come across various recipes for pozole, nothing quite inspired me to break open that bag and get cooking.  Since Adam was in my same predicament, when I saw his post I knew it was time!  And I'm glad I did finally use that hominy, because it made a great stew.  Cubes of tender, long-stewed pork are a great counterpoint for the chewy, slightly nutty hominy.  And, the addition of collard greens in the last 20 minutes of cooking adds an awesome veggie element and really makes this a one-dish meal.  Leftovers heated up well, but you can also make a half-recipe for a smaller group.

On another note - the winner of my giveaway for Nudo olive oil was Erin.  Erin - congrats, and look for an email from me in your inbox!

Pork Stew with Hominy and Collard Greens (adapted from Melissa Clark of the New York Times, via Amateur Gourmet)
Serves 8

1 pound dried hominy, such as Rancho Gordo brand
3 pounds boneless pork butt, cut into 2-inch-square chunks
1 T kosher salt, plus more to taste
1 tsp black pepper
3 T vegetable oil
2 yellow onions, finely chopped
4 garlic cloves, finely chopped
1 T chile powder
1 tsp ground cumin
1 tsp oregano
1 bay leaf
1 cinnamon stick
2 chipotles in adobo sauce
1 (12-ounce) bottle lager-style beer
2 pounds collard greens (about 2 bunches), center rib removed, leaves chopped
Lime wedges, for serving
Cilantro leaves, for serving

1. Soak the hominy in lots of water overnight (at least 8 hours). Drain.
2. Season the pork with salt and pepper. Heat the oil in a Dutch oven over medium high heat. Sear the meat in batches until it's well browned - this will take longer than you want it to, but keep at it! Transfer the meat to a plate.
3. Pour out some of the fat, leaving enough to cook the onions. Add the onions and cook until soft, 5-7 minutes. Add the garlic, chile powder, cumin, oregano, bay leaf, and cinnamon. Cook for one minute, and then return the pork to the pot.
4. Stir in the chipotles, hominy, and beer, along with 6 cups of water and 2 tsp salt. Cover, bring to a boil, and then reduce heat and simmer, covered, for about 1-1/2 hours. Stir in the collards after 1 hour and 10 minutes, so they get about 20 minutes of cooking time. The meat and hominy should be tender -- cook a little longer if not. Add more water if the stew is too thick for your liking.
5. Fish out the bay leaf and cinnamon stick, and discard. Taste and adjust for salt and pepper.
6. Serve with lime wedges and cilantro.

Sunday, October 6, 2013

SRC: Blueberry Ricotta Pancakes

My partner for this month's Secret Recipe Club was Aly of Cooking in Stilettos.  I was tempted by lots of the delicious recipes on her blog, like her black and tan brownies, short rib chili, and ancho-tequila chicken.  Yum!  But, as you guys know well, I am a sucker for good brunch food!  Taking time to make something special on a Saturday or Sunday morning is one of my favorite weekend treats.  These blueberry ricotta pancakes are a perfect weekend pancake in my mind (and stomach) -- they're sweet and delicious, and they won't take all morning to make.

I've had plenty of lemon ricotta pancakes at restaurants, but never any with blueberries inside.  It's a great pairing - the ricotta makes the pancakes more moist and almost custard-y, while the blueberries provide bright, juicy flavor.  Of course, you could easily substitute chocolate chips or another fruit if you prefer -- I also love small-diced apples in pancakes.  I loved that this recipe used lots of ricotta cheese, because I always end up with some left over in the fridge from lasagna, calzones, or pizza.  You can use part-skim if that's what you have on hand, but I think whole milk ricotta makes these even yummier.  Fair warning: these are a bit trickier to flip than normal pancakes, because the ricotta makes them a little more fragile, but the extra effort will be well worth it once you sit down to a plate of hot, delicious blueberry pancakes.  Enjoy!


Blueberry Ricotta Pancakes (adapted from Giada de Laurentiis, via Cooking in Stilettos)
Serves 2-3

1-2/3 cups water
1-1/2 tsp vanilla extract
2 cups instant pancake or waffle mix
1 cup whole milk ricotta cheese
Cooking spray
3/4 cup fresh blueberries

1. In a large bowl, combine the water and vanilla extract.  Add the pancake mix and whisk until just combined - some lumps are okay.  Add the ricotta, and again whisk until just combined.
2. Heat a large non-stick skillet over medium heat, and set the oven to warm.  Spray the skillet with cooking spray.
3. Ladle the batter into the skillet, about 1/4 cup per pancake, working in batches.  As soon as you put the batter in the skillet, drop several blueberries onto each pancake.  When the top is bubbling and starting to set, flip.  When the pancakes are cooked through, transfer to a plate, cover with foil, and stash in the warm oven until all the pancakes are cooked.  Repeat with the remaining batter and blueberries.
4. Serve hot with toppings of your choice - butter and syrup are delicious!


Plus, here are my past Secret Recipe Club creations: baked egg over veggies, cranberry-lemon quick bread with pecans, eggplant parmesan pasta bake, fifteen-minute dinner rolls, green chile cornbread, creamy chicken lasagna, salt-marinated steak, chocolate apple cake, summer salad, crispy smashed potatoes, m. jacques' brandy chicken, roasted carrots with spiced pistachios, buttermilk waffles, herbed bulghur wheat salad, oatmeal jam bars, rhubarb-ginger spice bread, zesty lemon and almond sticks, portuguese corn bread, chocolate brownie cookies, flat iron steak with blue cheese sauce, creamy scramble with fresh veggies, turkey chili, crisp and spicy roasted chickpeas with lamb

And, here are the recipes from my blog that my SRC partners have tested: spiced oatmeal cranberry apricot cookies, pear spice bread, pork belly soup with collard greens, asparagus pesto pasta, lemon sponge pie, baked eggplant parmesan, almond crunch coffee cake, strawberry crisp, world peace cookies, thai green beans with tofu, blueberry peach crisp, salty caramel ice cream, orange-chocolate macaroonschewy chocolate brownie cakes, dark chocolate and sea salt cookies, steak au poivre, pear-pecan spice breadvalencia orange curdnutella chocolate chip cookies, nutella chocolate chip cookies (2.0)

Friday, October 4, 2013

Spicy Harissa Ratatouille

Before the summer weather completely fades away, I highly recommend making this spicy summer stew.  I think it's especially pretty with yellow summer squash and orange tomatoes -- the colors just scream  "Summer!" to me. This stew is full of lots of fresh veggies, and spiced up with harissa, a North African spice paste.  You might find the prepared spice paste at your market, or you can use a dry spice mix, which is what I had on hand.  You can also make your own harissa - check out a couple of recipes here and here. I kept the amount of spice on the low side, but you can always add more to taste.  Heat up some crusty bread on the side to soak up all the yummy juices.


Check out my other ratatouille recipes: roasted ratatouille pasta sauce, ratatouille lasagna.
And, don't forget to enter my giveaway for cacao nib olive oil!


Spicy Harissa Ratatouille (adapted from Home Made Summer)
Serves at least 4

Olive oil
1-1/2 medium yellow onions, sliced
2 garlic cloves, minced
1 bell pepper, coarsely chopped
1 medium zucchini or summer squash, diced
1 medium eggplant, diced
4 large-ish tomatoes, coarsely chopped
2 large sprigs fresh thyme
1 to 3 tsp dry harissa spice mix or harissa paste, depending on how spicy you like your food
Salt

1. Heat a big glug of oil over medium heat in the largest skillet you have (or a large soup pot). Add the onions, and cook them, stirring often, while you chop all the rest of the veggies (10 minutes or so).
2. Add the garlic and saute for another minute.  Then add the pepper, zucchini, eggplant, tomatoes, thyme sprigs, harissa, and a generous pinch of salt.  Stir very carefully - it may look like you have far too much for your skillet, but it will cook down eventually!
3. Let the ratatouille bubble over medium-low heat for about half an hour, stirring occasionally, until the vegetables are nice and tender.  Remove the thyme sprigs.  Taste and adjust for seasoning.  Serve with crusty fresh bread or creamy polenta.

Tuesday, October 1, 2013

Classic Mac from Homeroom in Oakland

First off - don't forget to enter my giveaway for cacao nib olive oil! Now, on to today's post...

My boyfriend and I are both big fans of Homeroom in Oakland -- it's a restaurant focused on mac and cheese, and you really can't go wrong with that!  I was super excited to see that they just put out a cookbook, and was able to pick up a copy at the library.  Honestly, I was glad to take a look at it from the library, because this is one of those cookbooks that's one basic recipe with lots of variations -- every mac and cheese recipe pretty much uses the same base, with different cheeses and other add-ins stirred in.  That totally makes sense since that's how they do things at the restaurant, in their extremely tiny kitchen.  But, cookbook-wise, you're not getting a huge amount of variety here.  (I should add -- there are also recipes for sides and desserts, but let's be honest -- I was really in it for the mac and cheese!)

My other pet peeve with this cookbook was offering a base recipe that makes the wrong amount!  Every recipe starts off with two cups of bechamel sauce -- but the base recipe given is for three cups of bechamel. If this were made of cheap ingredients, fine -- but I'm not throwing away a third of a sauce made from whole milk and butter.  Supposedly (i.e., the reason given), this is because it is "difficult" to whisk together two cups worth of sauce, but I'm not really sure why that would be.  I made my bechamel in a non-stick skillet and had no problems getting it to work with the correct amounts that will be used in the final mac and cheese, which I've listed below.

Griping aside, I will give this book points for providing recipes that really do seem to replicate what's made in the restaurant.  Sometimes I've made recipes out of restaurant cookbooks, and felt like I wasn't really getting the same dish, either because the recipe didn't scale down well to a home kitchen, or because the techniques were simply too time-consuming or complicated to really make at home.  Since mac and cheese is a pretty simple dish, this really did taste like what you get at the restaurant -- a fairly mild, ultra creamy mac and cheese that's pretty much total comfort food.  Next time, I'll probably take the option of baking the mac and cheese with crispy panko on top, because I think that would make it even better.  Sadly I can't re-create the atmosphere at Homeroom in my living room (think big wooden tables, drinks in Mason jars, and uber-hipster waiters), so I'll probably be going back for the real thing sometime soon!


Classic Mac from Homeroom in Oakland (adapted from The Mac + Cheese Cookbook: 50 Simple Recipes from Homeroom, America's Favorite Mac and Cheese Restaurant)
Serves 3-4

12 ounces dried pasta
2 cups whole milk
1/3 cup unsalted butter
1/3 cup all-purpose flour
1-1/3 teaspoons kosher salt
1-1/2 cups grated 2-year–aged, extra-sharp Cheddar cheese (about 4 ounces)
1/2 cup grated Pecorino Romano cheese (about 1-2 ounces)

1. Put on a big pot of water to boil.  When the water boils, add some salt along with the dried pasta, and cook until the pasta is almost tender -- a minute or so less than the package recommends.  Drain, rinse in cold water, and keep ready until the cheese sauce is done.  (You can cook the pasta while you prepare the sauce to save time!)
2. In a medium pot, heat the milk over medium heat until it just starts to bubble - not a full boil. Remove from the heat.
3. Meanwhile, heat a large, non-stick skillet over medium heat.  Melt the butter in the skillet, and then add the flour and whisk constantly until the mixture turns light brown, about 3 minutes.  Remove from the heat.
4. Slowly whisk in the hot milk - it's okay if the mixture seems thick and lumpy at first...it will all smooth out as you go.  Make sure to use a silicone-coated whisk to protect your pan!
5. Put the skillet back over medium high heat, continuing to whisk constantly.  The sauce is ready when it's silky, thick, and coats a spoon -- mine was ready almost immediately, but it might take up to 2-3 minutes.  Whisk in the salt.
6. Add both the Cheddar and the Pecorino Romano cheese to the sauce, whisking to combine.  Cook until the cheese is barely melted, about 3 minutes, whisking often.
7. Add the cooked pasta, stir to combine, and continue to cook, stirring with a rubber spatula.  The pasta is ready when it's hot and steaming - about 3-5 minutes.
8. Eat right away - this pasta is best steaming hot.  Leftovers don't do well in the microwave - instead, try heating them up on the stove over medium-low heat with some extra milk, stirring the whole time.


Here I am enjoying the 'real deal' at Homeroom last year.  Yum!

Saturday, September 28, 2013

Indian Spiced Spinach

I love serving curry for dinner, but depending on the type, I need to come up with a veggie to serve on the side.  Salad is always an option, but it's nice to serve something with Indian flavors.  While I love the more typical Indian veggie dishes like palak paneer, baingan bharta, dal, or vegetable curry, some of them are pretty time-consuming, meaning I don't want to tackle them on the same night that I'm making a meat or chicken curry.  This spinach is the perfect solution -- it's got great Indian flavor, but it cooks up super fast with a minimum of prep time.  Try it out next time you're trying to add a little green to your plate! Or, serve it on top of a baked potato with a poached egg to make a complete meal.

This spinach would be fantastic alongside: mango-chicken curry, meatball curry, salmon with red curry sauce, slow cooker green curry pork, egg noodles in rich chicken curry sauce, murgh makhani, quick 'tandoori' chicken, sloppy bombay joes, and slow cooker butter chicken.


Indian Spiced Spinach (adapted from 101 Cookbooks, original recipe here)
Serves 2

1 T ghee
1/4 tsp yellow mustard seeds
1/4 tsp whole cumin seeds
1/4 tsp red pepper flakes
1 shallot, minced
1 large clove of garlic, minced
1/4 tsp salt
8 ounces baby spinach
Squeeze of lemon juice

1. Heat the oil in a large skillet over medium heat. Add the mustard seeds and cumin seeds, cover with a lid, and let them toast for a minute or so.  Stir in the red pepper flakes and let cook for a minute.
2. Stir in the shallot and garlic and cook until translucent, stirring often.  Season with salt.  Add more ghee if needed.
3. Stir in the spinach, and cook until it wilts.  Squeeze in the lemon juice and taste and adjust for seasoning.