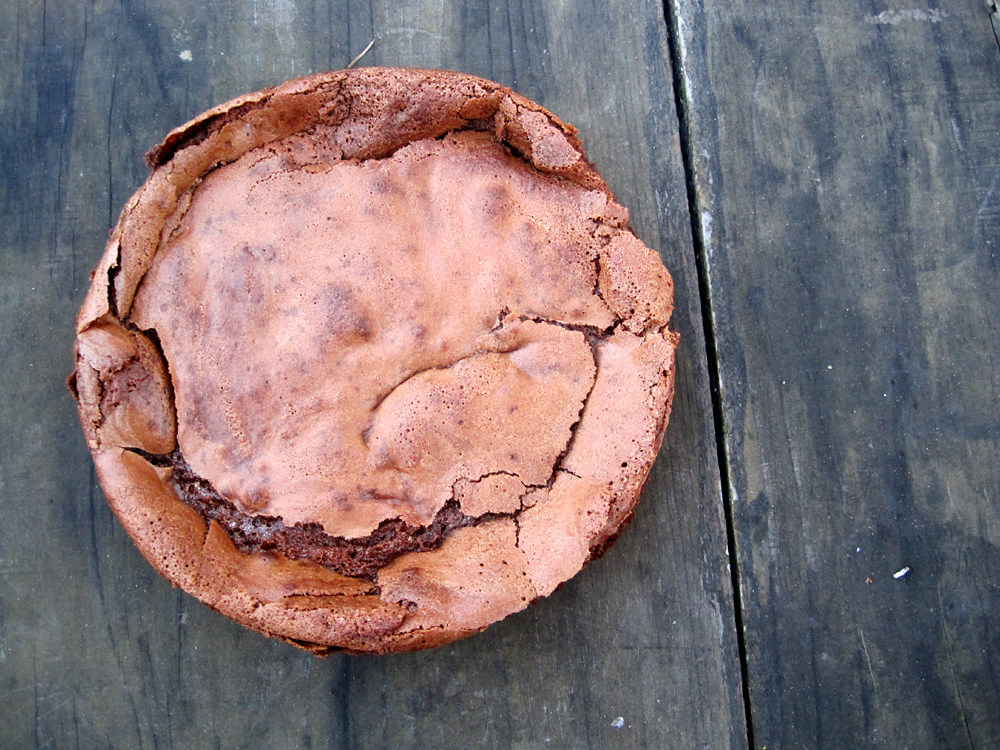
I love applesauce cake, and this one is particularly delicious. Along with the usual warm spices that go into applesauce cake, it also contains freshly ground black pepper, which adds a surprising spiciness that's really tasty. The moist cake is combined with my very favorite caramel frosting, a recipe of my mom's that comes from Ladies Home Journal. Note that you'll need to frost the cake just as soon as the frosting is ready - it can't sit around or it will harden. As you can see from the photos below, it also cracks like crazy if you slice the cake after the frosting has set, so be sure to slice it while the frosting is still slightly warm if you're concerned about this. Either way, it's super yummy!
Applesauce Cake with Caramel Frosting (adapted from Food52 and Ladies Home Journal)
For the cake:
1 cup all purpose flour
3/4 tsp baking soda
1/2 tsp kosher salt
Several grinds freshly ground black pepper
1 tsp cinnamon
1/2 tsp ground ginger
Large pinch freshly ground nutmeg
1 large egg
1/2 cup granulated sugar
1/4 cup light brown sugar
3/4 cup unsweetened applesauce
1/3 cup vegetable oil
1/2 tsp vanilla
For the frosting:
1/4 cup unsalted butter
1/2 cup brown sugar
3 T milk
3/4 cup confectioners sugar
1/2 tsp vanilla
1. Make the cake: Preheat oven to 350 degrees and butter and flour an 8-inch square pan. Whisk together the flour, baking soda, salt, pepper, and spices. In a separate bowl, beat together the egg and both sugars until light. Mix in the applesauce, oil, and vanilla until smooth.
2. Gently fold the dry ingredients until smooth but not over-mixed. Pour batter into prepared pan and bake until a tester comes out clean, about 30 minutes.
3. Make the frosting: Melt butter over low heat. Remove from heat and add the brown sugar, stirring until smooth. Return to low heat, bring to a boil, and boil for one minute. Add the milk, and then gradually add the confectioners sugar, stirring with a wooden spoon until the frosting is thick and smooth. Stir in the vanilla and then pour over the cake and frost while both cake and frosting are still warm.
Monday, January 31, 2011
Wednesday, January 26, 2011
Moroccan Spinach and Chickpeas
This chickpea dish is very hearty and delicious, making it a perfect vegetarian dinner. I cooked the chickpeas myself from dried chickpeas because I'd read that they're really different than canned chickpeas. I was really happy with the results - I thought the chickpeas turned out with a better, nuttier flavor and a less mushy texture. However, to make this a quick weeknight dish I think you could easily substitute canned chickpeas and still get a really good result. Overall, the flavors of this dish were really interesting and not like other chickpea-spinach dishes I've had before. The lemon is crucial - I thought the flavors felt a bit flat until I added it. The smoked paprika is also a fantastic addition both in terms of color and flavor.
I only had about half as much spinach as the original recipe called for and I definitely thought it could use more - I listed the full amount in the recipe below and I'd recommend using it all unless you're also low on spinach! It's amazing how much spinach wilts down - it seemed like I had plenty until I steamed it! For the bread, feel free to make substitutions - the original recipe called for a "country loaf", and I used homemade whole wheat bread. I think any relatively hearty bread would work well here (you wouldn't want soft sandwich bread).
Moroccan Spinach and Chickpeas (adapted from Smitten Kitchen via Serious Eats, original recipes here and here)
Serves 3
9 ounces baby spinach
2 T olive oil
1 large slice (about 4 ounces) hearty whole wheat bread, cut into cubes
3 medium garlic cloves, minced
1/4 heaping tsp ground cumin
Large pinch red pepper flakes
1 T red wine vinegar
22 ounces cooked chickpeas (preferably cooked yourself, but canned are okay too)
1/2 cup crushed San Marzano tomatoes, plus more as needed
Salt and pepper
Juice of 1/2 lemon
Smoked paprika
1. Steam the spinach until wilted. Chop coarsely and set aside.
2. Heat the oil in a large non-stick saucepan over high heat. Add the bread and and cook, stirring occasionally, until browned, about 5 minutes. Turn off the heat and add the garlic, cumin, and red pepper flakes immediately. Stir for one minute, either off the heat or over low heat as needed to slightly cook the garlic.
3. Scrape the mixture into a food processor and add the vinegar. Process until the mixture forms a paste, and then return to the pot. Add the chickpeas and tomatoes, and season with salt and pepper. Cook over medium-high heat, stirring often, and add more crushed tomatoes as needed to moisten the mixture.
4. After about 5 minutes, add the spinach and lemon juice and stir to combine. Once everything is warmed through, serve, sprinkled with smoked paprika.
I only had about half as much spinach as the original recipe called for and I definitely thought it could use more - I listed the full amount in the recipe below and I'd recommend using it all unless you're also low on spinach! It's amazing how much spinach wilts down - it seemed like I had plenty until I steamed it! For the bread, feel free to make substitutions - the original recipe called for a "country loaf", and I used homemade whole wheat bread. I think any relatively hearty bread would work well here (you wouldn't want soft sandwich bread).
Moroccan Spinach and Chickpeas (adapted from Smitten Kitchen via Serious Eats, original recipes here and here)
Serves 3
9 ounces baby spinach
2 T olive oil
1 large slice (about 4 ounces) hearty whole wheat bread, cut into cubes
3 medium garlic cloves, minced
1/4 heaping tsp ground cumin
Large pinch red pepper flakes
1 T red wine vinegar
22 ounces cooked chickpeas (preferably cooked yourself, but canned are okay too)
1/2 cup crushed San Marzano tomatoes, plus more as needed
Salt and pepper
Juice of 1/2 lemon
Smoked paprika
1. Steam the spinach until wilted. Chop coarsely and set aside.
2. Heat the oil in a large non-stick saucepan over high heat. Add the bread and and cook, stirring occasionally, until browned, about 5 minutes. Turn off the heat and add the garlic, cumin, and red pepper flakes immediately. Stir for one minute, either off the heat or over low heat as needed to slightly cook the garlic.
3. Scrape the mixture into a food processor and add the vinegar. Process until the mixture forms a paste, and then return to the pot. Add the chickpeas and tomatoes, and season with salt and pepper. Cook over medium-high heat, stirring often, and add more crushed tomatoes as needed to moisten the mixture.
4. After about 5 minutes, add the spinach and lemon juice and stir to combine. Once everything is warmed through, serve, sprinkled with smoked paprika.
Sunday, January 23, 2011
Roasted Red Pepper Pesto-Goat Cheese Quesadilla
I've been eating this quesadilla for lunch pretty much non-stop lately. It has the perfect blend of creamy goat cheese, tangy pesto, and something green to make you feel a bit virtuous. It's also fantastic as a grilled cheese sandwich, although slightly messier.
The red pepper pesto recipe makes way more than you need for one quesadilla or sandwich, but don't worry - you'll definitely use it up! I love red pesto like this one way more than the green variety - somehow it's just more interesting. Although the red pesto is often made with sun-dried tomatoes, roasted red peppers make a great substitution here - you can roast your own if you're feeling ambitious, or just get a jar at the store. Either way, this is not a recipe to be missed!
I love that this sandwich is so easy to pull together. The pesto itself is a quick one - I just put everything in the container for my immersion blender and blended away, though a regular blender or food processor would work just as well with a bit more clean-up. Then once the pesto is made, the actual quesadilla is even quicker to pull together - the perfect quick lunch along with some fruit or a small salad.
Roasted Red Pepper Pesto-Goat Cheese Quesadilla (adapted from Closet Cooking, original recipes here and here)
Makes 1, easily multiplied
2 tortillas (I used tortillas made of a whole wheat-yellow corn blend)
1 ounce goat cheese
Baby spinach and/or basil leaves
2 T roasted red pepper pesto, recipe below
Crumble the goat cheese over one tortilla. Top with the baby spinach or basil. Spread the pesto over the other tortilla, and then flip over onto the cheese and spinach. Toast in a non-stick skillet over high heat until the cheese is melted and the spinach is wilted, flipping halfway through. Cut in halves or quarters with a pizza cutter and serve immediately.
Roasted Red Pepper Pesto
2 roasted red peppers
3 T fresh basil leaves
2 cloves garlic, smashed
2 T pine nuts
2 T grated Parmesan cheese
2 T olive oil
1 T balsamic vinegar
Salt and pepper to taste
Combine everything and then blend with an immersion blender or food processor until a slightly chunky pesto forms.
The red pepper pesto recipe makes way more than you need for one quesadilla or sandwich, but don't worry - you'll definitely use it up! I love red pesto like this one way more than the green variety - somehow it's just more interesting. Although the red pesto is often made with sun-dried tomatoes, roasted red peppers make a great substitution here - you can roast your own if you're feeling ambitious, or just get a jar at the store. Either way, this is not a recipe to be missed!
I love that this sandwich is so easy to pull together. The pesto itself is a quick one - I just put everything in the container for my immersion blender and blended away, though a regular blender or food processor would work just as well with a bit more clean-up. Then once the pesto is made, the actual quesadilla is even quicker to pull together - the perfect quick lunch along with some fruit or a small salad.
Roasted Red Pepper Pesto-Goat Cheese Quesadilla (adapted from Closet Cooking, original recipes here and here)
Makes 1, easily multiplied
2 tortillas (I used tortillas made of a whole wheat-yellow corn blend)
1 ounce goat cheese
Baby spinach and/or basil leaves
2 T roasted red pepper pesto, recipe below
Crumble the goat cheese over one tortilla. Top with the baby spinach or basil. Spread the pesto over the other tortilla, and then flip over onto the cheese and spinach. Toast in a non-stick skillet over high heat until the cheese is melted and the spinach is wilted, flipping halfway through. Cut in halves or quarters with a pizza cutter and serve immediately.
Roasted Red Pepper Pesto
2 roasted red peppers
3 T fresh basil leaves
2 cloves garlic, smashed
2 T pine nuts
2 T grated Parmesan cheese
2 T olive oil
1 T balsamic vinegar
Salt and pepper to taste
Combine everything and then blend with an immersion blender or food processor until a slightly chunky pesto forms.
Friday, January 21, 2011
FFwD and SHF: Michael Rostang's Double Chocolate Mousse Cake
This week's French Fridays with Dorie was a fantastic flourless chocolate mousse cake. The process took a while because there were a couple of rounds of baking-and-chilling, but the hands on time for this recipe wasn't too bad and I was really happy with the results. This definitely tasted more like mousse than like cake to me, which wasn't a bad thing. Dorie offers a few variations on the recipe - after making the chocolate mousse, you bake a bit of it as a little crust, and then add the rest of the mousse and either chill, bake and serve warm, or bake and chill. I took the final option since I was taking the mousse cake to a dinner at church and it seemed to be the most portable (plus, it didn't involve raw eggs, which I don't mind eating myself but I get a little nervous about when serving a big group). The flavor was really good, although I'd have to say that I preferred the mousse pre-baked, straight out of the bowl, so if I make this recipe again I think I'll make the first option and just keep it all for myself and close friends. :) The only change I made to the recipe was to multiply the recipe by one-and-a-half and bake it in a 9-inch springform pan rather than an 8-inch pan...more mousse cake = a very good choice!
I'm also sending this cake off to Sugar High Friday #73: Grain Free.
Wednesday, January 19, 2011
Yeasted Corn Bread
This is one of those recipes that ended up with so many substitutions that it became something totally new, but still really delicious. It uses the method from Healthy Bread in 5 Minutes a Day, although it's not as full of whole grains as the recipes in that book since we'd run out of whole wheat flour. Feel free to substitute the barley flour here with more all purpose flour or whatever other interesting flour you have sitting around - I had a bag open from making strawberry barley scones, so I threw some in. Either way, I definitely recommend this bread. It's flavorful but super easy to make (though it does require some resting time), and making corn bread with yeast rather than chemical leavening means you don't need any added fat to make the bread soft and flavorful. This bread is very tasty alongside Mexican food (we had it with enchiladas), topped with barbecued meat, or just spread with honey or jam.
Yeasted Corn Bread
3/4 cup masa harina
2-1/2 cups all purpose flour
2 T wheat germ
2 T barley flour
2-1/4 tsp active dry yeast
1-1/2 tsp sea salt
1-1/2 plus 2 T lukewarm water
1/4 cup shagback hickory syrup (or substitute maple syrup, molasses, honey, etc.)
1. Whisk together the masa, flour, wheat germ, barkley flour, yeast, and salt.
2. Whisk together the water and syrup in a separate bowl, and then stir into the dry ingredients with a rubber spatula.
3. Cover and let rise until the dough rises and collapses, about 2 hours.
4. Use immediately, or chill up to one week before baking.
5. Dust hands and a work surface with flour, and shape the dough into two equal-sized balls. Allow to rest on a foil-lined baking sheet 40-90 minutes (40 for room temperature dough or 90 for chilled dough). Thirty minutes before baking, preheat the oven to 450 degrees.
6. Just before baking, brush the top crust with water and slash the dough with a knife. Bake 30 minutes, or until browned and firm. Allow to cool before slicing.
Yeasted Corn Bread
3/4 cup masa harina
2-1/2 cups all purpose flour
2 T wheat germ
2 T barley flour
2-1/4 tsp active dry yeast
1-1/2 tsp sea salt
1-1/2 plus 2 T lukewarm water
1/4 cup shagback hickory syrup (or substitute maple syrup, molasses, honey, etc.)
1. Whisk together the masa, flour, wheat germ, barkley flour, yeast, and salt.
2. Whisk together the water and syrup in a separate bowl, and then stir into the dry ingredients with a rubber spatula.
3. Cover and let rise until the dough rises and collapses, about 2 hours.
4. Use immediately, or chill up to one week before baking.
5. Dust hands and a work surface with flour, and shape the dough into two equal-sized balls. Allow to rest on a foil-lined baking sheet 40-90 minutes (40 for room temperature dough or 90 for chilled dough). Thirty minutes before baking, preheat the oven to 450 degrees.
6. Just before baking, brush the top crust with water and slash the dough with a knife. Bake 30 minutes, or until browned and firm. Allow to cool before slicing.
I'm submitting this bread to Yeastspotting...check out all the other fantastic yeast breads!
Monday, January 17, 2011
French Fridays with Dorie: Gnocchi a la Parisienne
Ever since I got Dorie Greenspan's Around My French Table
a few months ago, I knew this was the sort of cookbook that was full of treasures I wanted to try my hand at. French Fridays with Dorie provides that little "push" needed to actually make that happen, by baking one recipe together each week. Now, you may notice that it's not Friday right now, but I do have a good excuse! I bought all the ingredients last Tuesday to be ready to go, but then I got a terrible head cold -- I blame the airplane! However, last night the dish of the week - Gnocchi a la Parisienne - proved to be just as delicious on a Sunday as on a Friday.
Gnocchi a la Parisienne is fantastic comfort food. The gnocchi is made out of cream puff dough rather than potatoes, and so while it's sort of messy to deal with, I'd say it's actually easier to make than normal potato gnocchi - rather than forming each one individually and scoring with a fork, you just scoop teaspoons of dough into simmering water. It also helped to have help when making this recipe, since there are a lot of components - thanks, Tim!
The sauce is a bechamel, which is where we ran into trouble. For some reason, our sauce got way too thick (think Jello-bechamel). Maybe this is because we were making a half recipe, so the proportions were off? I wasn't sure I could save it, but it all worked out in the end. If you ever have bechamel problems, here's what I did: I whisked the extra-thick bechamel over low heat with quite a bit of milk until it was starting to combine. Then, I strained it, pushing all the lumps through the strainer to break them up, and then whisked everything over medium-low heat again. Finally, I used my immersion blender to get rid of any remaining lumps and smooth everything out. Voila - near-perfect bechamel!
To add to the richness of poached cream puff dough and bechamel sauce, this dish is topped off with lots of cheese (I used Parmesan and Comte), as well as little dots of butter. Then it goes in the oven to get all browned and bubbly. Delicious! Although Dorie says this can be served on it's own, I'd recommend serving it with something acidic on the side to cut through some of the richness. I sauteed some fennel, garlic, and thinly shredded dinosaur kale, and then squeezed lemon juice all over the veggies - this made the perfect side dish to balance out the gnocchi.
Note: since we're cooking through lots of recipes in Around My French Table
, we won't be posting all the recipes, but I definitely encourage you to buy the book or check it out of your local library. All the recipes I've tried so far have been fantastic, and it's so much fun to get a little taste of France at home!
Gnocchi a la Parisienne is fantastic comfort food. The gnocchi is made out of cream puff dough rather than potatoes, and so while it's sort of messy to deal with, I'd say it's actually easier to make than normal potato gnocchi - rather than forming each one individually and scoring with a fork, you just scoop teaspoons of dough into simmering water. It also helped to have help when making this recipe, since there are a lot of components - thanks, Tim!
The sauce is a bechamel, which is where we ran into trouble. For some reason, our sauce got way too thick (think Jello-bechamel). Maybe this is because we were making a half recipe, so the proportions were off? I wasn't sure I could save it, but it all worked out in the end. If you ever have bechamel problems, here's what I did: I whisked the extra-thick bechamel over low heat with quite a bit of milk until it was starting to combine. Then, I strained it, pushing all the lumps through the strainer to break them up, and then whisked everything over medium-low heat again. Finally, I used my immersion blender to get rid of any remaining lumps and smooth everything out. Voila - near-perfect bechamel!
To add to the richness of poached cream puff dough and bechamel sauce, this dish is topped off with lots of cheese (I used Parmesan and Comte), as well as little dots of butter. Then it goes in the oven to get all browned and bubbly. Delicious! Although Dorie says this can be served on it's own, I'd recommend serving it with something acidic on the side to cut through some of the richness. I sauteed some fennel, garlic, and thinly shredded dinosaur kale, and then squeezed lemon juice all over the veggies - this made the perfect side dish to balance out the gnocchi.
Note: since we're cooking through lots of recipes in Around My French Table
Thursday, January 13, 2011
Sour Thai Fish Curry
My dad says he could eat this soup every day! I'm not sure I'd eat it that much, but I definitely loved it. The original recipe is much more authentic, so I recommend taking a look at the cookbook, Thai Street Food, if you have access to an Asian market or just to take in the absolutely gorgeous photography. However, if you're making this curry in rural Ohio like I was, you can still get an absolutely delicious soup without hard-to-find ingredients. The only tough one we did end up finding was tamarind water (tamarind paste mixed with water and strained before measuring), but you could substitute lime juice here if you cannot find it. For the chilies, use any dried chilies you can find - we could only find chilies that were labeled "Mexican" but they worked just fine. Add some dried red pepper flakes at the end if the curry doesn't end up being spicy enough for your taste. I loved making this recipe because it was a good reminder that if you start with good ingredients, you'll probably end up with something really delicious even if it isn't totally authentic. Plus, it was really interesting to learn the new technique of working with dried chilies and making a curry paste.
Sour Thai Fish Curry (adapted from Thai Street Food
by David Thompson)
Serves 6
Sour Orange Curry Paste
8 dried long red chilies (use your best judgment here)
Generous pinch salt
1/4 cup chopped shallots
3-4 small poached shrimp
About 1/3 cup poached white fish (see below)
6 cups stock or water
Generous pinch salt
2-3 shallots, peeled and quartered
Generous pinch sugar
1/4 cup fish sauce
5 T tamarind water (see note above)
16 ounces white fish fillet (such as orange roughy), cut into bite-sized pieces
4-5 baby bok choy, rinsed well, leaves separated, and roughly chopped
Steamed rice and lime wedges, to serve
1. Make the paste. Pinch the stalks off the chilies and remove their seeds. Soak in hot water until soft, 10-15 minutes. Meanwhile, poach the shrimp and about half a fillet of the fish in simmering water until cooked through.
2. Drain the chilies and squeeze out as much water as possible. Add to a small food processor along with the salt until the mixture forms a paste. Add the remaining curry paste ingredients in the order listed, reducing each to a fine paste before adding the next, adding just a bit of water as necessary.
2. Bring the stock or water to a boil with salt. Add the curry paste, rinsing out the food processor to make sure all is used, and simmer one minute before adding the shallots. Simmer 3-4 minutes, then season with sugar, fish sauce, and the tamarind water. Add the fish and greens and continue to simmer until everything is cooked.
3. The curry should be sour, salty, and a little hot – adjust with fish sauce, tamarind water, and/or chili powder as needed. Serve with steamed rice and lime wedges.
Sour Thai Fish Curry (adapted from Thai Street Food
Serves 6
Sour Orange Curry Paste
8 dried long red chilies (use your best judgment here)
Generous pinch salt
1/4 cup chopped shallots
3-4 small poached shrimp
About 1/3 cup poached white fish (see below)
6 cups stock or water
Generous pinch salt
2-3 shallots, peeled and quartered
Generous pinch sugar
1/4 cup fish sauce
5 T tamarind water (see note above)
16 ounces white fish fillet (such as orange roughy), cut into bite-sized pieces
4-5 baby bok choy, rinsed well, leaves separated, and roughly chopped
Steamed rice and lime wedges, to serve
1. Make the paste. Pinch the stalks off the chilies and remove their seeds. Soak in hot water until soft, 10-15 minutes. Meanwhile, poach the shrimp and about half a fillet of the fish in simmering water until cooked through.
2. Drain the chilies and squeeze out as much water as possible. Add to a small food processor along with the salt until the mixture forms a paste. Add the remaining curry paste ingredients in the order listed, reducing each to a fine paste before adding the next, adding just a bit of water as necessary.
2. Bring the stock or water to a boil with salt. Add the curry paste, rinsing out the food processor to make sure all is used, and simmer one minute before adding the shallots. Simmer 3-4 minutes, then season with sugar, fish sauce, and the tamarind water. Add the fish and greens and continue to simmer until everything is cooked.
3. The curry should be sour, salty, and a little hot – adjust with fish sauce, tamarind water, and/or chili powder as needed. Serve with steamed rice and lime wedges.
I'm submitting this recipe to Kitchen Bootcamp: Soups.
Subscribe to:
Posts (Atom)